Discription

Everything Southern & So Cotton Pickin Cute
Showing posts with label Patriotic. Show all posts

Sunday, May 25, 2014

Quick & Easy Patriotic Projects & Recipes

I've gathered 10 diy projects from Pinterest to add a little red, white & blue to your Memorial Day celebration.
I made sure to look for quick and easy projects and recipes, so lets get to it.
This idea came from 1-800-Flowers.com

Love this super easy table runner from Domestically Speaking.

Misty at The Creative Itch Boutique brilliantly came up with spray painting white doilies for this cute garland.

Nothing says U.S.A. more than watermelon stars! You'll find a plethora of ideas over at Kara's Party Ideas.

More from Kara's Party Ideas - candy filled gumball tubes.

These chalk firecracker party favors from Dollar Store Crafts will dress up the table and put a smile on the kids faces.

What's more summery than strawberries & blueberries?  The Wannabe Chef has the recipe for these yummy little gems.

It wouldn't be much of a summer celebration without some red, white & blue ice pops.  See how to make them at My Recipes.

Greet your guest with this easy to make patriotic rag wreath from Lucy's Lamp Shade.

You can never have too many Garlands, like this one from Jessica Wilson over at Makezine.

I spent Saturday working outside on the house. Since chores are done it's time for us to head to the beach and catch some rays.  I hope y'all are doing something fun today too.

Catch y'all later...
 
My eyes will be on the faithful in the land, that they may dwell with me; the one whose walk is blameless will minister to me.
~Psalm 101:6

Friday, July 12, 2013

The Easiest DIY Sewing Project Ever

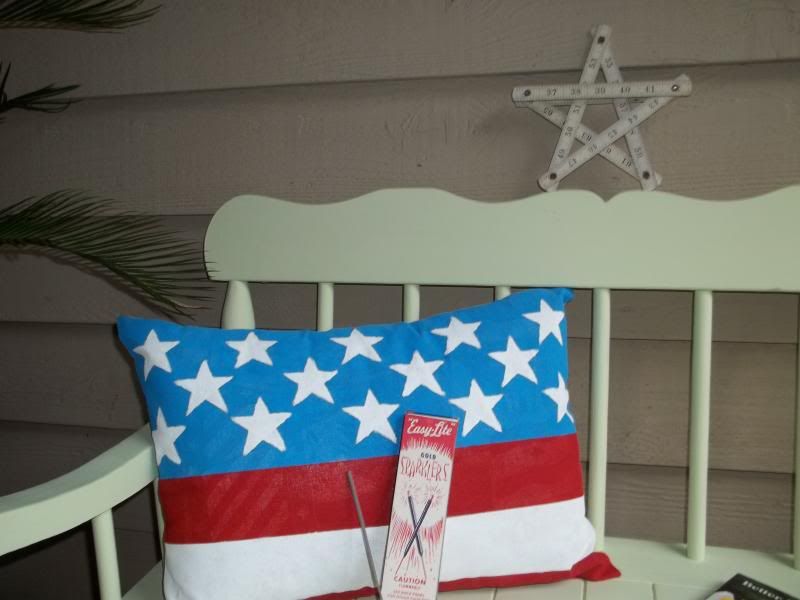
Happy Friday y'all!  How about a crafty project.  My motto is if you can't find it, can't afford it, then make it for nearly nothing. Upcycle, renew and reuse.  I made an easy pillow for the 4th using what I could find on hand.


I made one a little different last year.


The thing to remember here is you don't have to limit yourself to a patriotic theme.  You could easily paint waves instead of stripes.  Or maybe keep the strips and add a crescent moon with stars.  Heck paint some butterflies or dragonflies.  I have to keep it really basic because I'm totally not talented when it comes to painting.  Oh' but wouldn't wedges of fruit like oranges, limes and lemons be cute!

Here's a picture of my inspiration. I think I found it on Pinterest but it was created by Kierste over at Simply Kierste.  She is one crafty girl with a great blog.  She gave a tutorial and I basically followed her directions with a few variations.  Please click here to see her post.  I know you'll enjoy her blog as much as I do.  I adore her pillow.


I thought I'd show you the basic's on making these.  Lets start with this years painted pillow.

  • Step 1:  Use any old fabric you have on hand like I did.  A burlap or muslin works great.  Decide how big you want your pillow to be.  I wanted mine to be a rectangle since it would be a flag. I decided that I wanted my finished pillow to measure 19" x 14".  Before cutting it out I added 1" to each measurement for seam allowances.  Fold your fabric in half before cutting. I cut mine 20" x 15".
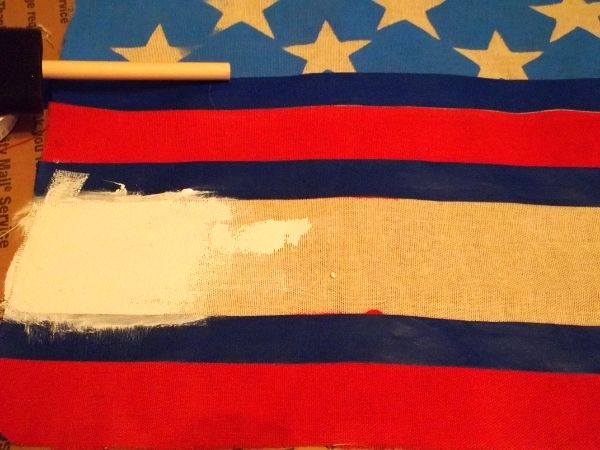
  • Step 2: On just one piece of the fabric measure out your placement.  I decided to have "3" stripes at  2 1/2" each.  That left 6 1/2 on the top for stars.  Using painters tape, tape each section being sure to use a spoon or something to really press the tape edge tight so paint doesn't seep under.  Don't worry if it does you can touch it up with a art brush.  I don't plan on washing these and since they're under a covered porch I didn't use fabric paint.  I just used craft paint, you can even use house paint.
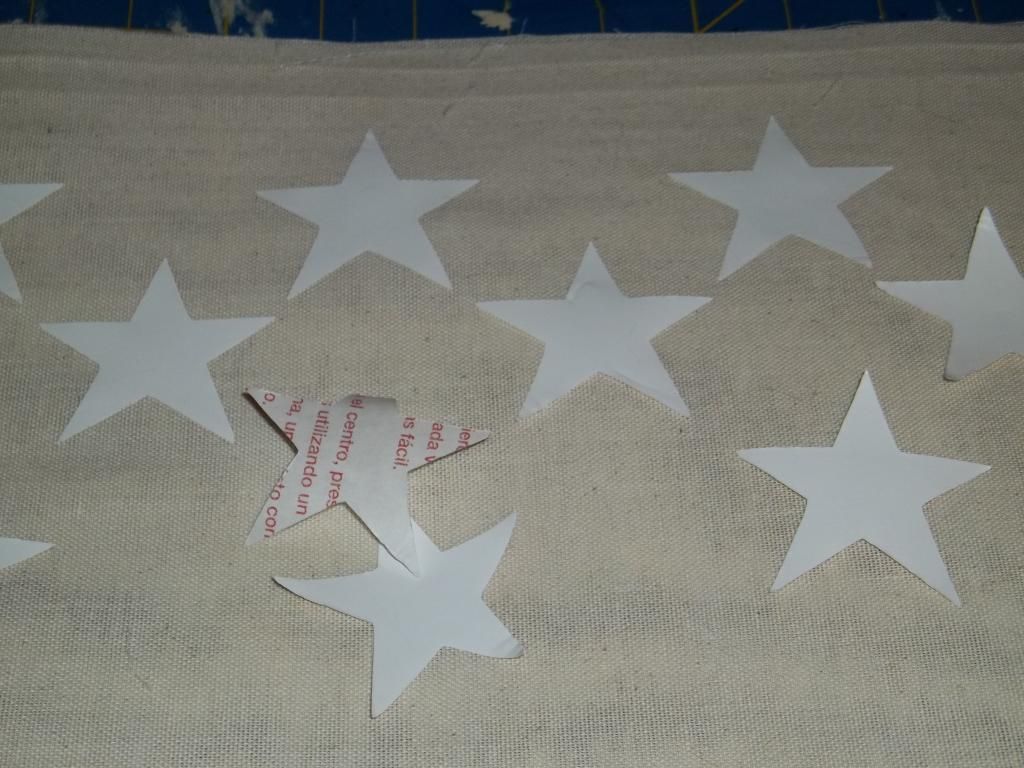
  • Step 3:  For my stars I used cheap vinyl shelf paper from the dollar store and cut 2 1/4" stars on my cricut.  You could also print a star shape from the internet and make a cardboard template and trace your stars but you would have to paint the blue first, unless you want to do a lot of tedious painting around the stars.  TIP: Be sure to put cardboard under your fabric before painting because it will seep through.

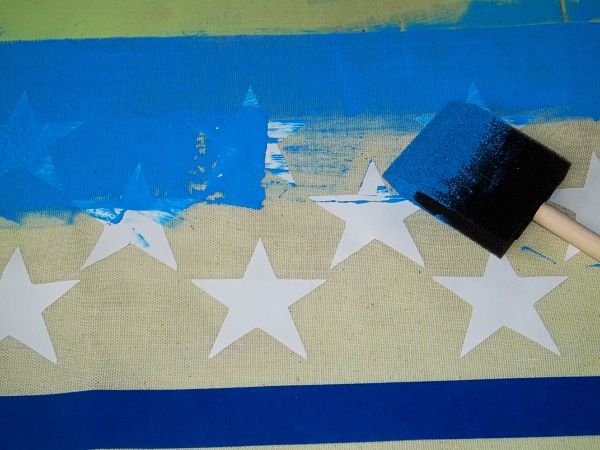
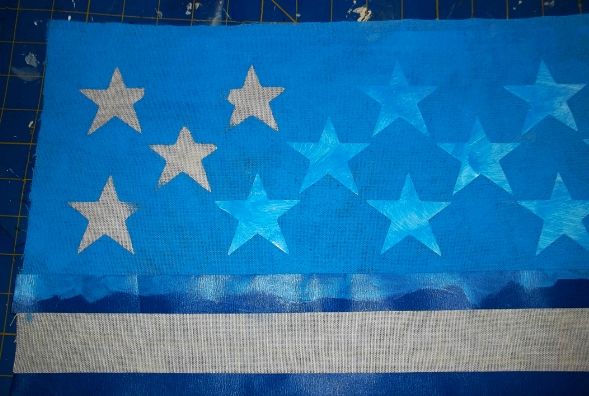
  • Step 4:  I half measured and half eyeballed my stars placement stuck them to the fabric and then painted the blue right over them. It would have been nice if I would have had a little foam roller but I didn't so I used a foam brush.  The brush did cause the edges of the stars to peel up a bit and the paint to get underneath.  Because of that I used a small paintbrush to paint the stars white.  I had originally planned to just leave them the natural fabric color. 
  • Step 5:  I carefully pulled the vinyl up while the paint was wet.  Once dry, I painted the stars white. You can also paint your white stripe now.  Once the white dries tape over the white and blue so you can paint your red stripes. Let dry.
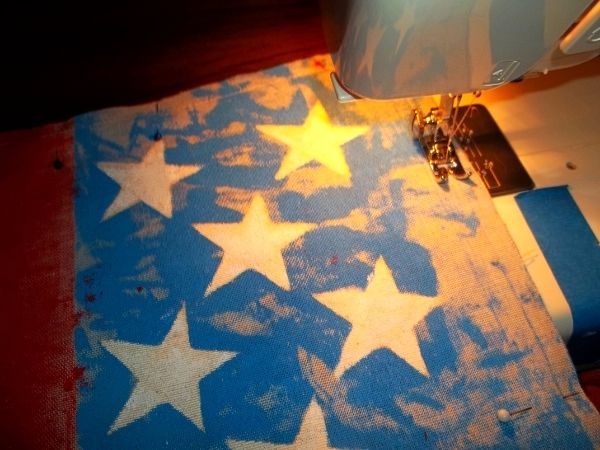
  • Step 5:  Time to sew.  My fabric doesn't really have a right and wrong side but if yours does pin right sides together and stitch 1/2" seams. It doesn't get much easier than stitching straight seams.  Be sure to leave an opening in the bottom big enough to add your pillow. *NOTE:  You can use double sided hem tape or even fabric glue or a glue gun if you don't want to try sewing.
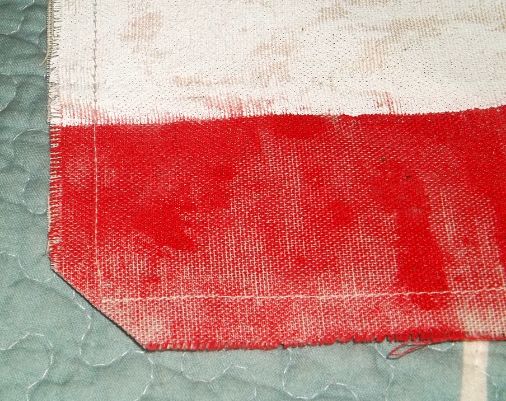
  • Step 6: Turn your pillow right side out.  Trim corners like I've done below being careful not to cut through stitching. Use the end of a spoon or fountain pen to push the corners out completely.
  •  Step 7:  Press you hem opening so it will be ready to sew after stuffing.
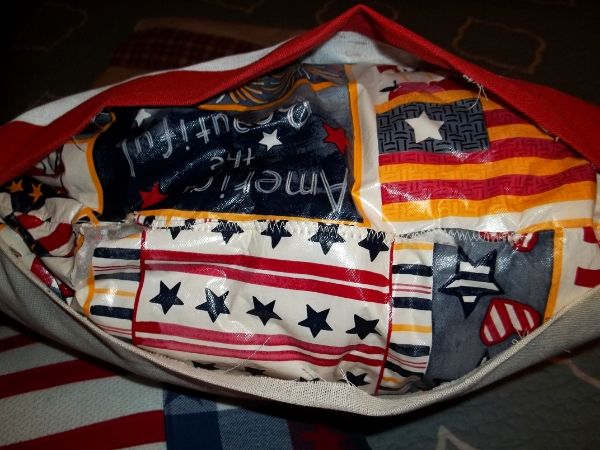
  •  Step 8:  You can do like I did and use an old bed pillow.  I just cut one 14" down from one end and most pillows are 15-18" wide.  Sew up the end of the pillow (the other 3 sides are already sewn).  To water proof my stuffing I used an old vinyl table cloth.  Yea, I never throw anything away.  You could also use 2 plastic grocery bags putting then on in opposite directions.  Bags don't need to be sewn but I did sew the table cloth around the pillow.  The just stuff it in there.  Pin your seam closed and then simply hand stitch or machine stitch closed.

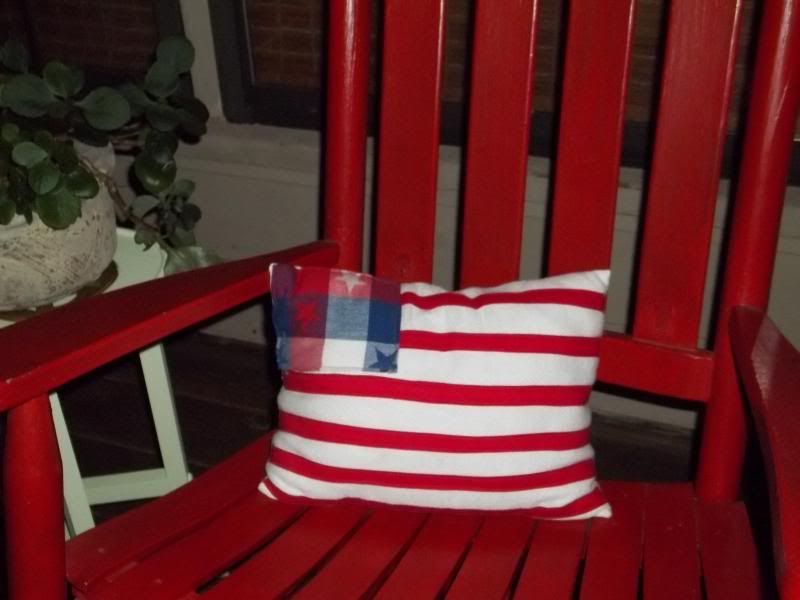
The smaller flag pillow was basically the same steps but instead of using paint I sewed a bit of patriotic plaid fabric that had stars and red seam binding for the strips.  It was stuffed with loose batting.
 

I hope you decide to make your own pillow.  It really is easy.  If you make one please come back and let me know because I'd love to see it too.

Stop back by tomorrow to see another before and after project.

Hugs Y'all...

♥ Tracy 
P.S.  Don't forget to come back Monday when the 5 day giveaway starts.  It's our first Celebrate Summer Giveaway!!  Amazing prizes worth $450! **Update: This giveaway has ended.


Monday, July 4, 2011

Playing with Paper and Glue for the Red White and Blue

First, I want to apologize to everyone who has left comments lately.  My computer's been giving me a fit for nearly a week now and it takes me forever just to get a post up.  Hopefully by tomorrow we might be back on track.  I appreciate all of you and your comments so much, it breaks my heart not to be able to let you know individually.  Danged computer, I barely even have any hair left. LOL.
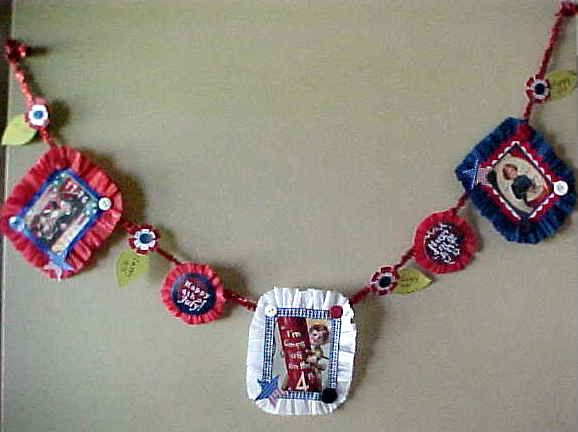
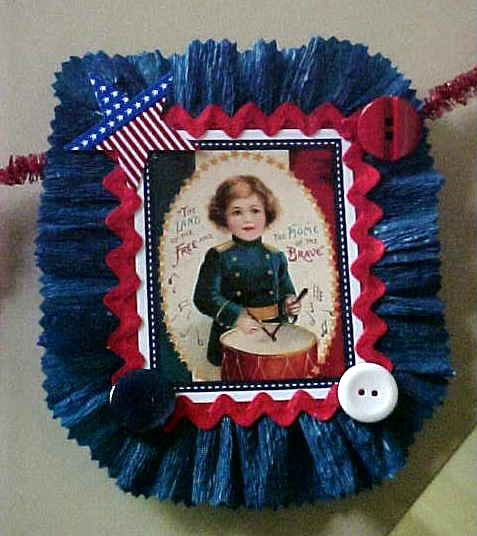
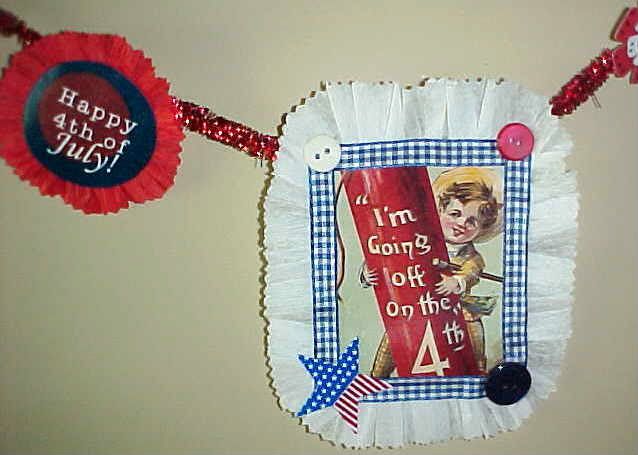
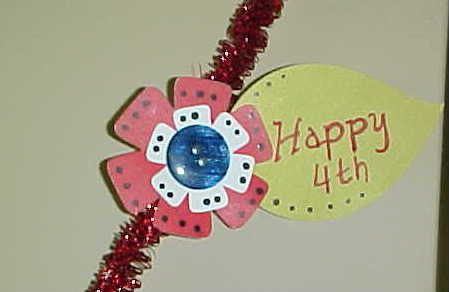
I finally grew up and now I get to play with paper and glue.  So I  made this to hang in my MIL's nursing home room,to celebrate our nations 235 birthday!  I finally played with my Cricut too and made the little flowers and leaves.  I can't wait to do more with it.  Go America!!!
When I was little we had an old craft book that belonged to my sister Joni or maybe it was just the families.  It was the early 1960's but I'm sure the book was from the 50's.  I loved that book it was black and white but to me, it was the most interesting book we had.  I looked at that old tattered book all the time.  I know my mother would be saying not again as she saw me heading her way with that book.  I was forever asking her if we could do some of those projects.  The answer was always the same, maybe tomorrow.  I'm sure mama had no clue that it was so important to me and that I would grow up loving to craft.
Mama never did care much for crafting that was more fun than it was practical.  Mama wasn't old fashion by any means. She always was interested in learning more.  I still remember her taking a high school night class on accounting.  It wasn't something she needed to do, she was a stay at home mom, she just wanted to.  She worked when she was younger and even for a short while when she first married.  Mom loved to play bridge, crochet, do needlepoint, cross stitch, crochet and knit.  She had more patience and coordination than I did.  But oh' how Mama could sew.  She was a seamstress extroidinaire.  Again, not craft sewing but clothing.  She was so good at sewing tailored clothing.  Something she only did for her and her girls and maybe a friend or two.   She learned from her mother just as most girls did in the 30's when it was so important and so neccessary. Maybe that's why she didn't care for quilting like my grandma.  Maybe she had seen too much of that done out of neccesity.  But later she still took more classes to learn the finer art of tailored slit pockets and things of that sort.  She had a very Jaqueline Kennedy, (mom's name was even Jackie) or Chanel Coco sort of style.  Simple was more. 
I can remember Grandma occasionally sewing on her old treadle singer sewing machine. I'm so proud to be the owner of that old sewing machine of Grandma's now.  Mama had a singer too, which I learned to sew on.  Thank goodness it was an electric machine.  I've had several sewing machines since then and none have been as good as that one was.  And none have certainly lasted as long.  That was way back when they were American made and made to last and last.  Most items were made that way back then.  It only seemed practical to make a product that would stand the test of time.  Later as business dynamics changed.  Companies came to the conclusion, that for a business model, that may not be the most profitable plan.  And so started the long or short road to the throw away society.
I love America and to me America means the history of our ancestors.  The strength that it took for them to fight for such a young country, to believe totally in it's purpose through good times and bad.  To be proud to call America home in the worst of times.  Always banning together for the common good when it truly mattered.  For the great sacrafices that families endured in times of war and how they still continued to love and believe in this great country of ours.  A country built on freedom, liberty and justice for all. 
I'm sure every country believes they are doing whats best.  And it's citizens are proud and have undying love for their country but as an American I know that our forefathers left their homes and came to this unknown land to make a better life for future generations. 
I've seen our society go through a ME generation and I believe we're seeing what was reaped from that now.  If anything positive has come from the economic crisis our country has recently faced, it's the coming together again.  The equal suffering of the rich and poor.  Oh' there will always be ones who are still spending what we as middle class could never even concieve.  They bank accounts may have even taken a hit but it's not like their daily lives will ever feel it.  But for the most part neighbors are more empathatic of others because they have been touched in some way by this shift in money.  Maybe there's something to be grateful for in that.

Thank God I live in America, The Land of the Free!!!

Have a wonderful and safe holiday weekend. 
XOXO's....Tracy :)