Discription

Everything Southern & So Cotton Pickin Cute
Showing posts with label upcycle. Show all posts

Sunday, January 19, 2014

Valentine Pillow Tutorial - Part Deux

Love is in the air, or the craft room at least.  It's got me talking all French and everything.  I have a lovely French accent with that downhome Y'all pitch.  NOT!
When we last left off, I was sharing my first Valentine Heart Pocket Pillow Tutorial with you HERE.  Now I want to share with you the bigger Scottie Pillow.  I think the little Scottish Terriers are so sweet.
I call this a tutorial very loosely, because I didn't really take pictures along the way, but it's so stinking simple.
I've said it over and over again that you can make something decorative out of anything.  Just look around at things, and try to see beyond their original purpose.  That's the whole concept of upcycling.

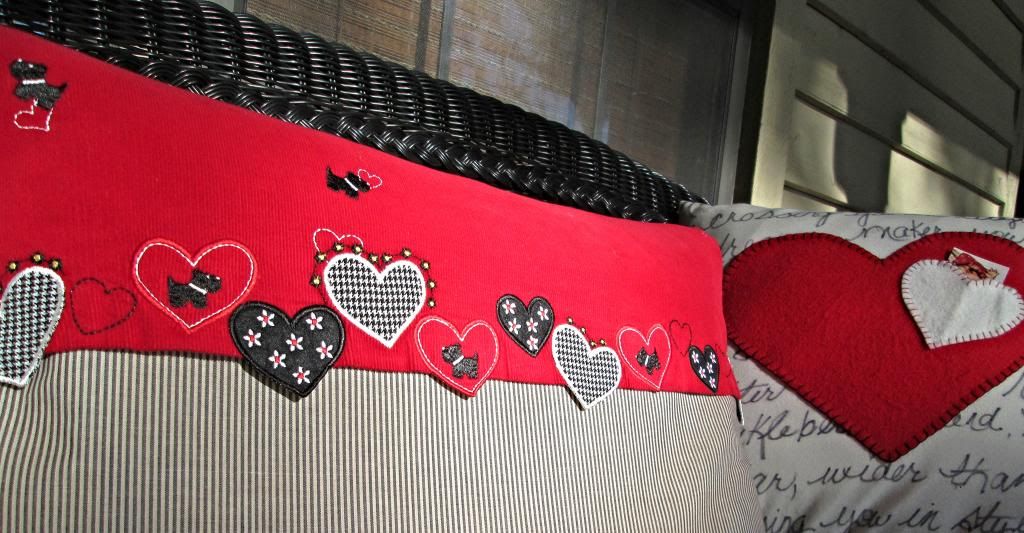
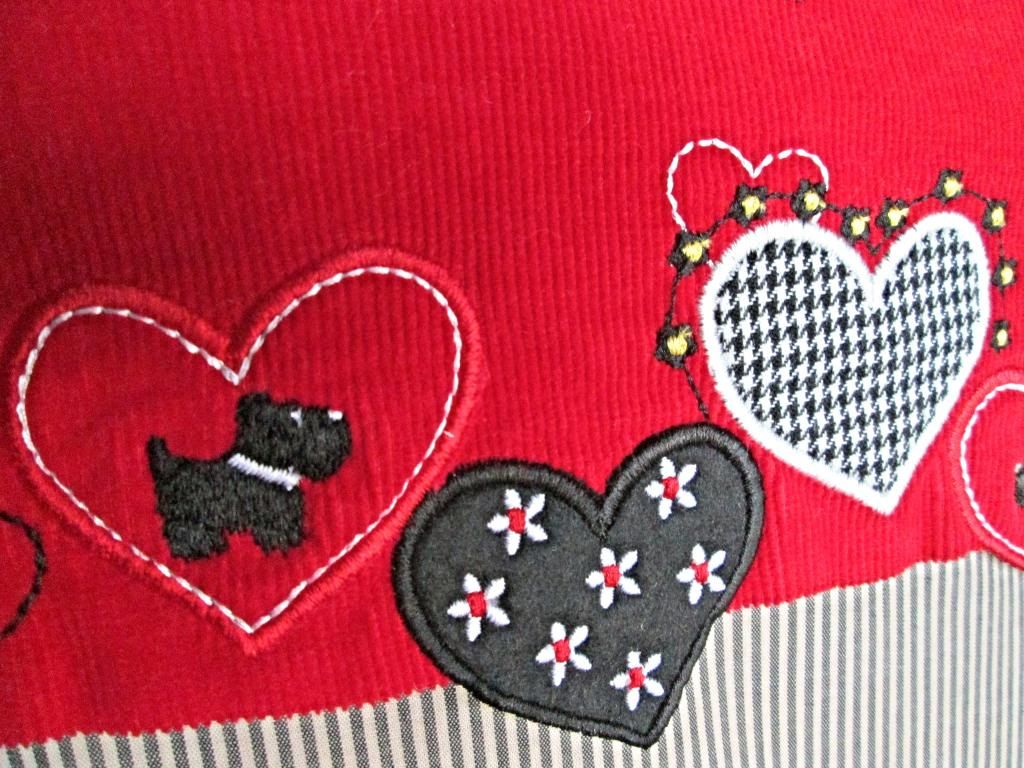
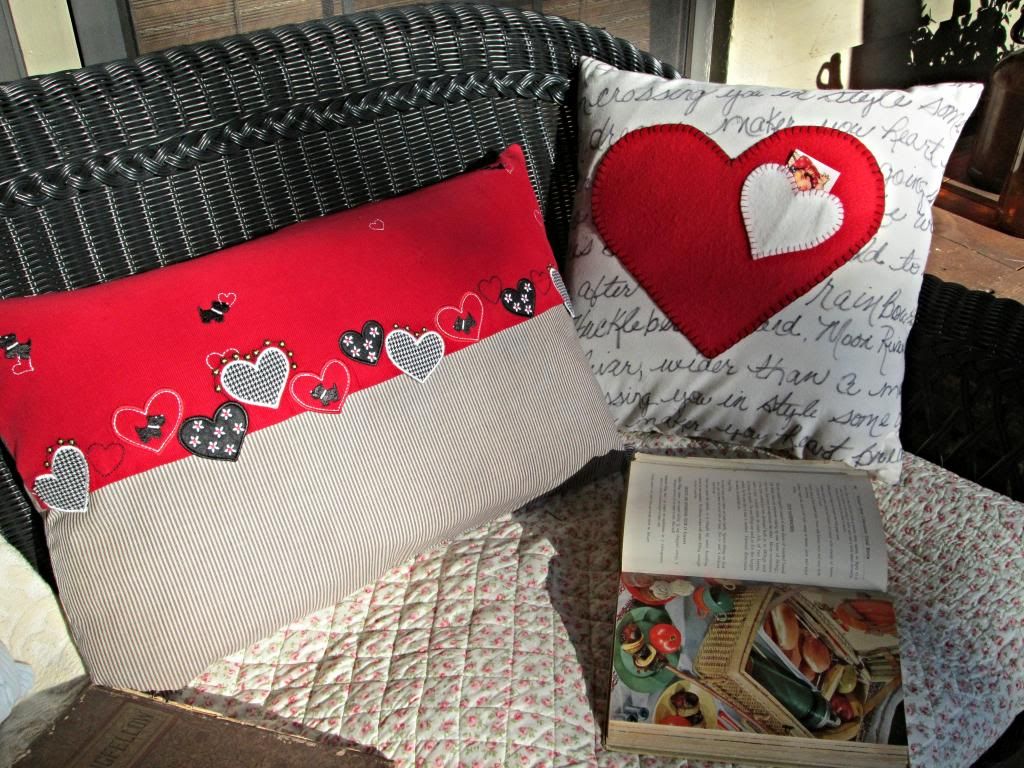
Take this pillow for instance.  You'd never guess what I used to make it.  That adorable red fabric was a little girls dress!  I wish I would have thought to take pictures of it before I cut it up last year.  Bad blogger, bad blogger!  As soon as I saw this sweet little toddlers dress in the thrift shop I knew I had to get it. I had no idea what I would use it for, but with those darling hearts trimming the hem of the jumper I couldn't pass it up. The placement of the hearts hanging off the fabric was the thing that made it so great, it was also the thing that made it stump me as to what to do with it for so long.  It sat in my fabric stash for over a year.

Of course I knew it would be a valentine project, so it was the first piece I went to the other day to start the valentine ball heart rolling.  I cut the top off when I got it because there wasn't enough fabric on the chest piece to be any good and the skirt had all the decoration anyway.  So I was left with what you see.  I didn't let an inch of that skirt go to waste either.

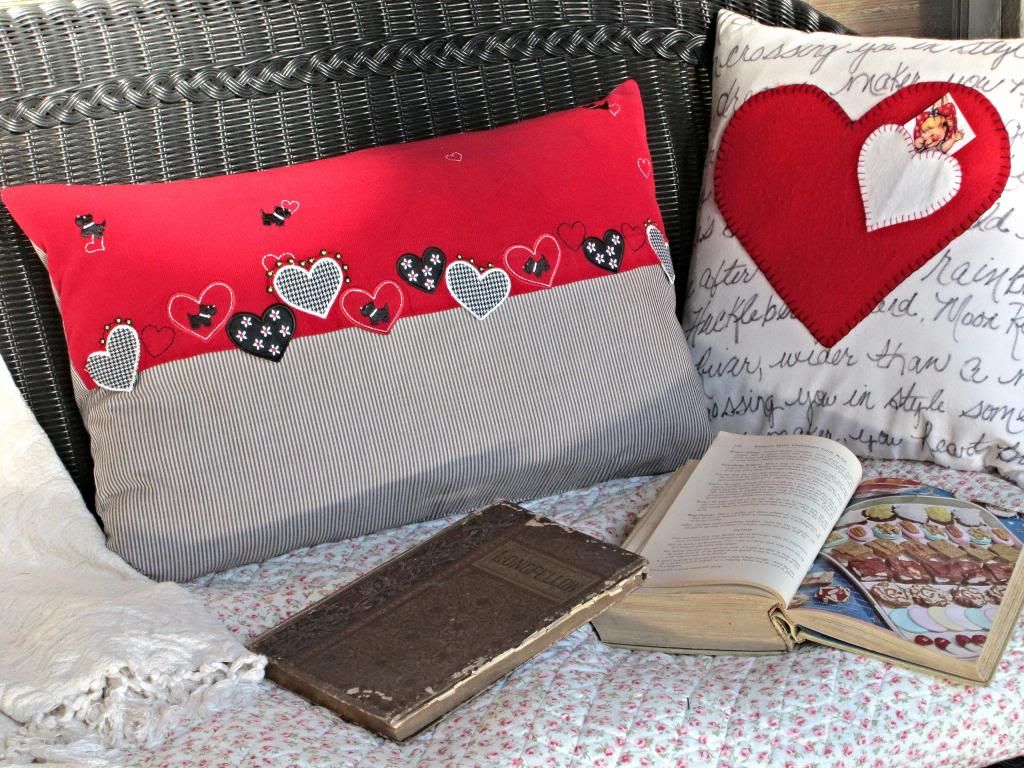
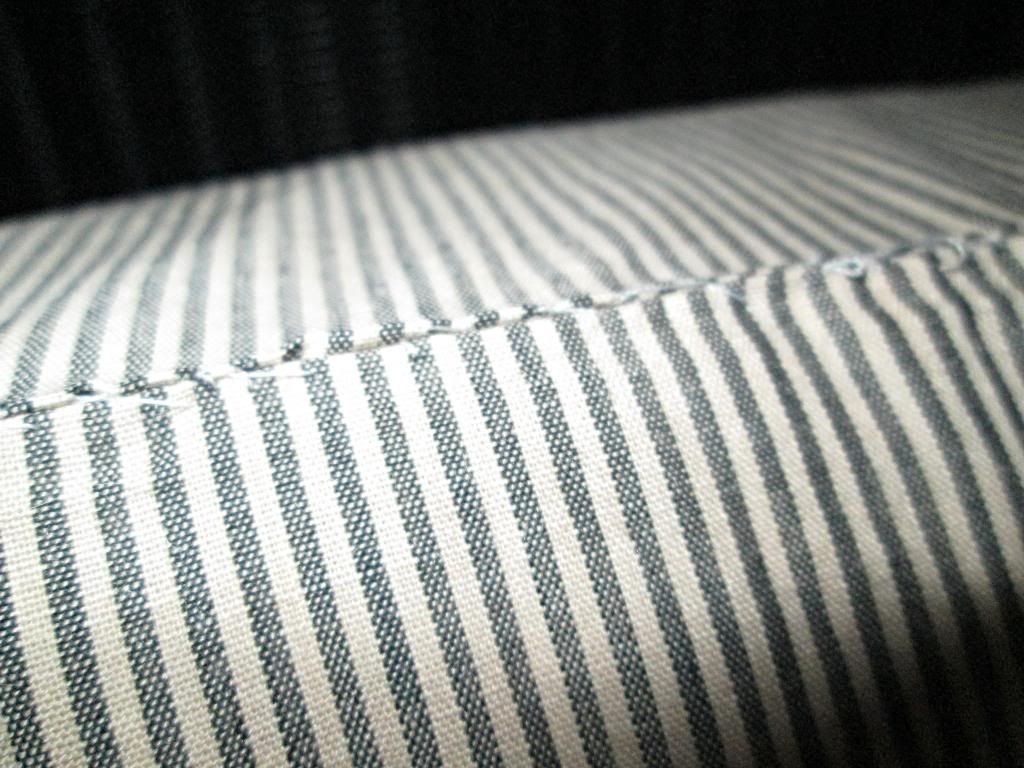
If you read the last tutorial HERE, it's basically the same concept.  Cut 2 pieces your background fabric in the size you want.  Mine was some old striped ticking that I had done a tea wash on to age it.  I thought the striped grey ticking would work with the black, red and white color scheme.
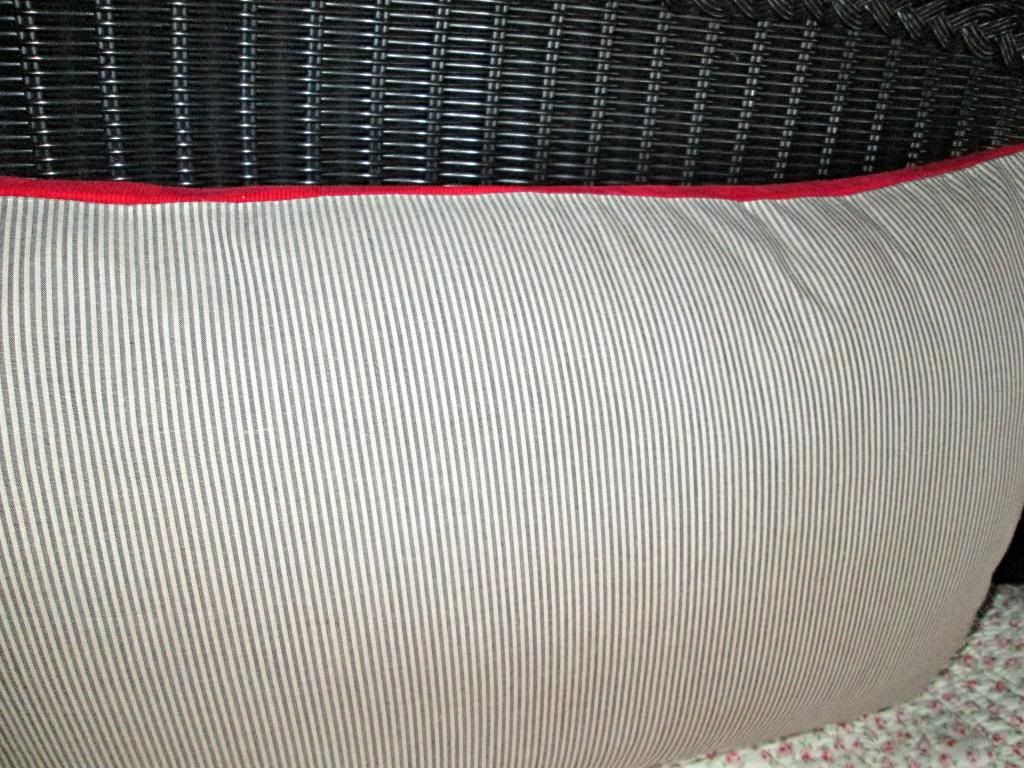
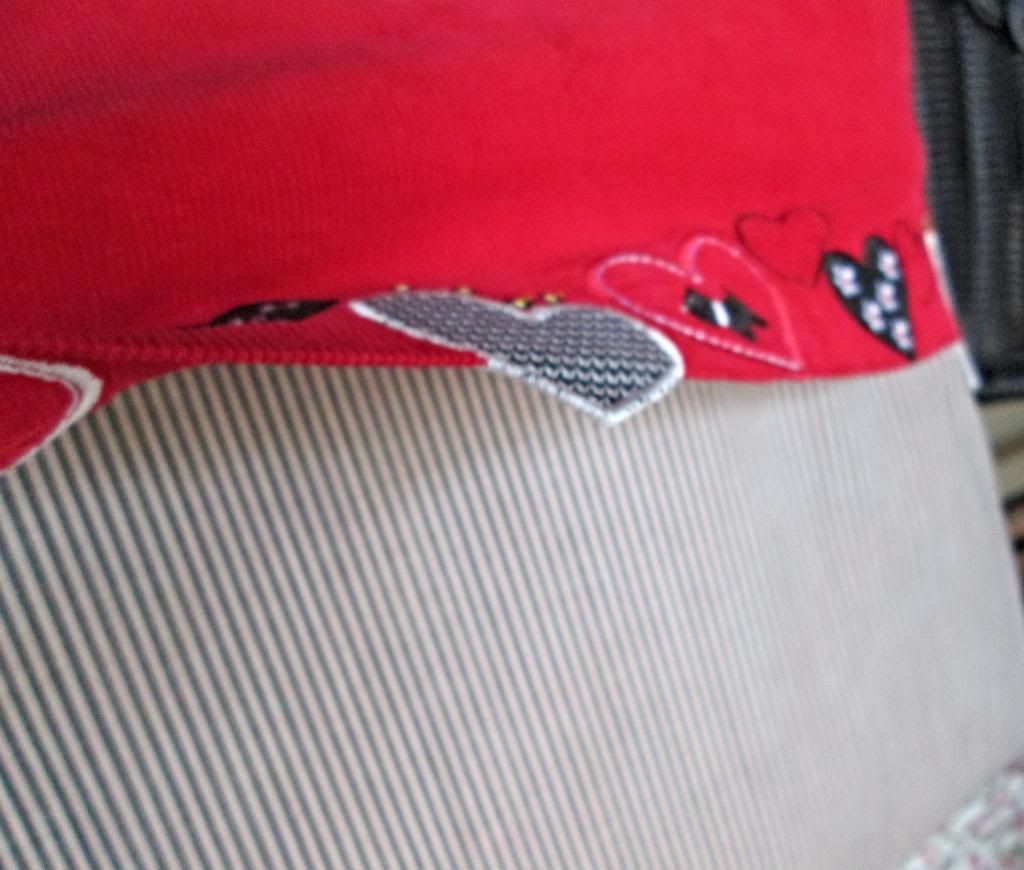
You can see in this photo how the red corduroy fabric was only sewn on 3 sides leaving the decorative hem loose.  

  • Lay the wrong side of the red fabric on top of the right side of the striped fabric and sew the three edges.
  • Next lay the two striped fabrics right sides together and stitch all sides leaving an opening in the center of the bottom of the pillow.
  • Instead of buying a pillow form, I took one of the many old and worn pillows I have in the closet for spares and cut it in half.
  • I stitched the pillow form (old pillow) up on the machine. Not being particular about how it looked.  Since it will be covered.
  • Stuff with the pillow and then do a blind hem stitch on the opening at the bottom and you're done!
And there you have it, an upcycled pillow from found items around the house.  Tomorrow's pillow is a little less valentine and definitely more winter.  Come back to see what it's made from tomorrow.
Love and Hugs Y'all...
Then make my joy complete by being like-minded, having the same love, being one in spirit and of one mind.  Do nothing out of selfish ambition or vain.
                                                                 ~ Philipians 2:2-5

Saturday, December 21, 2013

DIY Christmas Pallet Art Craft

Do you need one more project for last minute Christmas decorating.  I have one or two here.
You probably have just enough time to knock this baby out, all with things you can find right around your home.
Look around your house and see what you have that can spark your creativity.

After sitting my Santas out I need something in the middle with some height.  What to do, what to do?  I found one of these tacky little christmas trees in a plastic bucket sitting around.  I wasn't about to sit out untouched, as is.  I tore it out of the foam and looked at it like "what the heck am I gonna do with a wire post".  Inspiration struck when I went digging in Neil's room of weird treasures.
That's were I found this vintage cast iron bell holder. I love that it's stamped PHILA. PA and that it has that lovely scroll work!!  Upside down the hole was perfect for holding my tree. I just stuck a couple of styrofoam balls in to hold it up right.  I love it!!!
Remember when decorating balance is important.  Using lifts is a great way to achieve height.  One of my Santas was much smaller than the other.  They don't need to be the same size but more in scale than these really are.  By sitting the one Santa on a block of foam covered with a piece of scrap gingham fabric and sitting it in a basket basket, it's now more in scale.
Remember to just play with what you have and you'll be surprised how things come together.  I added a wrapped gift and these adorable pop-up cards to fill empty space.
Here's a simple tutorial to make your own pallet plaques.
The steps to making the pallet plaques, if that's what you call it, couldn't be more simple.
  1. Grab a some old fence boards, saw, hammer, nails, clamps and gorilla glue.
  2. Decide how big your plaques should be.  I used the bread size Christmas plates, so I made my plaques about 10"x14".
  3. I didn't have any glue at the times so I layed 3 boards side by side face down.  On the back I used 2 paint paddles and nailed each board.  You know my motto - "Get 'er done" with whatever you have, do or die.  The nails were too long, so once I turned the plaque over I just snipped off the tips of the nails. **If you have gorilla glue just skip this step and glue the planks together side-by-side and clamp till dry.  I did come back and add glue later.
  4. To make the hanger on the back I added 2 tiny tacks and wrapped floral wire between them.
  5. I didn't want my plates attached permanently because I'd like to change them out later for a summer feel.  To solve that issue I made homemade hangers by snipping paper clips in half and then attached them to the plate with a combination of gorilla glue and hot glue to hold in place and then cover them with a bit of felt.
And that's how you create pallet art work on a zero budget.
I have to admit the pallet and plate art wasn't my idea but I think I made it my own for Christmas.  I got the idea from April at House By Hoff.  She's one super creative gal, be sure to stop by and see for yourself.  You can see her pallet art tutorial that I pinned HERE.  

Hey, don't leave yet.  If you enjoy that DIY project, click HERE to checkout my Hot Cocoa Beverage Bar. 
Be sure to enter my Swiss Colony - Make entertaining easy giveaway HERE.

Merry Christmas Y'all...
The name of the Lord is a strong tower; the righteous run to it and are safe.
                  ~ Proverbs 18:10 

Tuesday, November 20, 2012

Table Centerpiece DIY AS Easy As Pie

Are you looking for last minute ideas for your Thanksgiving table?  I have an easy one that quick to make.
This is a DIY project using what you have.  I started with an old wooden crate.  I used the mini pumpkins still left from Thanksgiving.  Pinecones and Spanish moss from the yard.  Faux Pears and faux fall leaves from my stash.  

TIP:  When you use things like moss and pinecones from the yard put then in the oven at 200 degrees to kill any little pesty critters that are in them.  Let bake for about an hour.  Even though the oven's very low, keep your eyes on it, I've never had a problem, but better safe than sorry.
For the candle holders I used old mason or pickle jars or whatever.  These were so easy to make and turned out so pretty.  In the photo above you can see how pretty the candle lit glows through the print.  I ran out of candles and used a little electric votive in the small one.  Note: Must get more candles before Thanksgiving.

I used 2 ply Thankful napkins I got at Micheals.  Separate the plys and set them aside.  With a sponge brush I applied decoupage glue to the outside of the jar.  Then just apply the printed (pretty) piece of napkin face up, wrapping it around the jar.  Once it's on, apply more decoupage glue over it smoothing all the edges.Trim any extra.  I used a braided trim, you could use jute, to wrap around the top where the lid screws on.
On one I glued a jute bow and some acorns.  I also added a vintage key. On another I glued a gossamer ribbon with a vintage key.  
 The smallest one I glued a circle of just an an acorn.  Easy as pie!
Now just sit back and enjoy!  I love it!  What do you think?  Do you like to upcycle everyday items to save them from the landfill?

Have a blessed day ya'll.....
Tracy  


Tuesday, November 2, 2010

Quick Fast Makeover - OOPS!

 Yuck!  Pretty gross, right.  I hated the fabric that came on this very worn task chair.  Lint just clings to it so bad.  I can vacuum it daily but it's like an old sweater that's picked to pieces.  You just have to hand pick all the little balls off and it still looks cruddy.  

So what do you do when you exhausted but have adrenaline flowing and your itching to get one thing accomplished.  Why you start recovering a chair at 10 pm, of course.  That's what I did on Halloween night.


I remembered that I had a bolt of this fabric in the closet that I planned on doing something with.  Valences, pillows, who knows.  I liked it and it was on sale and I new it would go great in our office.  (Unfortunately, we still don't have that done).  Anyway it's a great heavy woven upholstery fabric.  With the dark muted colors and fingers crossed, no spills, it should last forever or at least till I'm totally sick of it.


It was really easy and a quick project.  I had my handy electric staple gun, a screwdriver and removed the seat and laid it on the fabric and cut out a big square.  The staple gun worked out just perfect for this part.

Here's where the "It's too late and your too wiped out  to do this" comes in.  I get the back off, not to hard.  I look at the shape of the back, center it on the fabric where I want it.  Checked it at least twice before I cut, left plenty of extra so I was sure to have enough.  Check, cut and start to staple.  Nope not happening.  The seat was wood this was heavy duty plastic and my staple isn't going through it.  

Okay, not a problem.   NEIL!!!!!!!

We find screws and the electric screwdriver/drill thingy.  And put in a lot of screws, then reattached the seat and back to the base.  Beautiful!!!  Simply beautiful, I'm thinking as I'm smiling ear-to-ear, so please that I accomplished and finish a task.

That is until it sat there mocking me........


Yep, look close.  The fabric on the back of the seat is upside down.  Did you notice, click the pictures to enlarge them.  I was so disappointed but not  disappointed  enough to recover it that night.  Who knows when I will either.  Luckily it's a not in you face pattern screaming "Hey, goofy put me on upside down".


Friday, October 8, 2010

No Money? ~ Just Upcyle When Decorating

Something Fun This Way Comes......

I found this idea while blog hopping a week or so ago.  You've probably seen many versions of it by now.  The smart and uber talented Kari at Ucreate did this project and I thought it was so cute I borrowed the idea myself.  This is our foyer wall that you face when you walk in.  That means this is also our seasonal wall.  I took three old pictures last year and repainted the white frames a flat black.  So that made this project super easy.  You can click here to see Kari's cute Halloween silhouette's.  I love how Robyn framed and displayed them.  She got the tutorial from Robyn at The Pink Peony of Le Jardin click here to see her tutorial.  Thank you Kari and Robyn!!

This frames originally had beach scenes in them and last fall I painted them and add pages out of wallpaper books.  Cheap and easy art.  Just find old books from a wallpaper store or even a sample from the store.  Lowe's used to have great borders that you could get samples of , which were perfect for smaller frames.  Cheap Thrifty art.  Perfect for my budget.

I choose 3 warm pictures wall paper scenes that reminded me of fall last year.
 I have a glass panel on my front door, hence the glare.
There was one big oops.  See those little dots on the wall in the photo below.  I had put a little putty, like you would use in floral arrangements to keep the photos from shifting last year.  Each puttied corner took off chunks of the wall or at least a few coats of paint.  I really should sit something decorative in between each one to hid them.  Well at least there's a chance the frames will turn back in the original direction when Halloween is over. Now what am I going to do for Thanksgiving?


Oh' and how do you like my pumpkin.  I love it.  It's a wonderful old paper mache pumpkin that I found.  Yes you read that right found, free, nada, zip!  I didn't have to look far, but I'll post more about that and my treasure load of vintage goodies later.

Hope y'all have a crisp cool fall weekend.  Hugs....Tracy :)

***REMINDER:  I have a few giveaways posted this week.  I hope you read back a few post and enter.  :)

Thursday, October 7, 2010

Not So Impossible After All


Well I teased you yesterday.  You do remember the teaser, the ugly before picture below.  I found this 3 panel screen thrown away after being good and beaten up so no one would want to rescue it.  Well people you didn't do a good enough job with your hammer.  Yep, I saw good bones (frame, that is).
The front above and the back below.  Poor thing all that art work ruined.
So  what do you get when you add that to this fabric (old twin bed skirt)?
Here's the first peek.
And here is the after.


Not too shabby for trash, if I do say so myself.
I did go buy the wooden trim.  I didn't want to lose the arched detail on the top but had to cover all the staples.  I decided to by some simple trim molding and cut to length and then stained to match the existing wood stain.  I already had the perfect stain, so no money there.  Yippee!

I knew I was going to have to find some braid or fabric trim to cover the staples on the top and bottom.  I dreaded spending the money for it.  Yes, I can be cheap or better yet thrifty.  One day I was in Walmart where they were clearing out there fabric department and low and behold they had the exact color I was planning to buy on sale for 75% off! I bought what they had left and there wasn't much of anything left in the dept.  It was a meant to be thing.  Don't you just love it when things all come together like that?  It was a perfect match.

 I know you're all disappointed, that there's no beautiful vignette but decorating under our circumstances is almost impossible.  This did match MIL room perfect and if you look behind the screen you would see her oxygen equipment that sits there unused. She refuses.  Oh' but don't look at the back of the screen, you'll still see hammer holes.

Final Tally:
  • Screen =  Free
  • Stain = Free, already had
  • Fabric = Free upcycled bed skirt I already had
  • Trim molding = apprx. $25.00
  • Fabric Trim = apprx. $3.00
TOTAL = $28.00

Impossible Dream or Is It?


Could I really salvage this wooden bi-fold screen?  I even had my doubts but just couldn't pass it by.  Actually I picked up this 3 panel bi-fold and a 4 panel one about a year ago and wasn't exactly sure what I wanted to do with it.  I was thinking about using it on the porch in someway but wasn't ready yet so up into the rafters of our shed it went.  Well a few months ago I finally took one down and decided it was makeover time. 

I know I'm just the worst about showing what I do get done. This is the back below.  All those crazy marks are hammer hits.  Yep, this was a brand new item from a local store and they tossed it but before they did they wanted to make sure no one else wanted it or could use it.  Ha, I say Ha to this, because it's just a bigger challenge. 


The fabric below is much prettier than my photo shows.  There's a great shimmer to the fabric.  Just enough to be chic and not gaudy.  It's really the skirt portion of a twin bed skirt.  I just couldn't bare to throw away because I knew the luxurious fabric had to be used for something.  I was thinking more like pillows.  Who knew there would be enough for this project.


Now for the reveal.........

We interrupt this post because I'm being witchy.  You'll have to come back tomorrow night and see the after.  Mean, aren't I?

Thursday, May 27, 2010

Pertending I'm Scarlett O' Hara and Sarah's Special Apron


 I just thought I'd share a few pictures of the apron I made for Sarah over at Gypsy Mermaid.
You've all heard me talk about Sarah before.  She's such a sweetheart.  She had a certain kind of Apron/top in mind and gave me an idea of what she was looking for. Now I'm not a pattern maker by any means so when she said she loved it and it fit I was thrilled.  

I just added a few extra touches with some vintage table scarfs and doilies.


Made a few flowers and added a few buttons.  Buttons make everything better.


I like finding a way to upcycle old items into something totally different and new.  This fabric started out as a pair of drapes with a burlap band at the top.  I felt just like Scarlett O'Hara making this one.  Hee-hee.


I was already to do more creating last week but it wasn't to be.  Now my heads just stopped up and I'm very uncreative.

Hugs ya'll......Tracy :)