Discription

Everything Southern & So Cotton Pickin Cute
Showing posts with label Recipe. Show all posts

Tuesday, April 29, 2014

Giveaway - Breakfast with Tropical Traditions Coconut Oil - #Mothers Day

Disclaimer: Tropical Traditions provided me with a free sample of this product to review, and I was under no obligation to review it if I so chose. Nor was I under any obligation to write a positive review or sponsor a product giveaway in return for the free product.

It's time for day two of our Mother's Day Gift Guide.  I'm really excited to tell you about Tropical Traditions Gold Label Virgin Coconut Oil.
I first heard about all the great benefits of coconut oil from my sister over a year ago.  Since then I've been seeing chefs on tv and bloggers everywhere talking about using coconut oil in their recipes.  One name kept showing up over and over again and that was Tropical Traditions.

I knew just what my first recipe would be.  Coconut Banana Pancakes.  Sometimes we like to eat breakfast for dinner.  Who has time for a big breakfast at breakfast time right?  So after a day at the beach yesterday, that was fitting my mood perfectly.  And this recipe is so easy and healthy.
This was my first time trying it and I wasn't sure if Neil would go for it but I was wrong.  He loved it too.  Who knew you could make pancakes without the flower.  3 simple ingredients and you're done!

I used the coconut oil in my pan just like you would and other cooking oil and I have to tell you not only did it add a great flavor but they didn't have all the greasiness your food normally does from cooking.  Another thing I noticed about the virgin coconut oil was the clean, pure smell.  I didn't have that stinky grease smell after cooking.  There are hundreds of uses for coconut oil. You can get an idea by viewing the short 94 second video below.


Here are just a few of the things I plan to use my virgin coconut oil for

  • Make your own Magic Shell Recipe for ice cream
  • Use it to condition a wooden cutting board
  • It makes a great massage oil
  • Homemade Lotion Bars
  • Use as a hand and foot spa treatment.  Add some Lavender or Tea Tree Essential Oil for added benefits.  Rub into hands and add gloves or socks
  • Make your own Homemade Lip Balm add a little peppermint oil for a nice scent and tingling feeling.
  • Mix with equal parts of baking soda for homemade goo-gone to remove sticky labels
  • Mix with a couple of drops of peppermint oil an effective insect repellent

My thoughts

I'm all about trying to incorporate more natural ingredients into our diet but like everyone else I worry about sacrificing taste.  Tropical Traditions is definitely one thing I will be adding to my kitchen pantry from now on.  I'm excited about using it in all sorts of new recipes.  I'm also eager to get some little plastic lip gloss jars and make my own chapstick and nail cream.

For more information about this wonderful product


Win it


Remember to go visit Julie over at Mamawj's Moment Away to enter her giveaway for even more chances to win!!

You'll also want to be sure to come back here every day this week and enter to win a new and different giveaway from one of the great sponsors we have lined up.  Click here to start at the beginning where you'll find each new giveaway link.


Stay strong ~ Live Long,


Your people settled in it, and from your bounty, God, you provided for the poor.
~Psalm 68:10

Wednesday, January 15, 2014

Me and the Snowman - A Winter Decor Tutorial

In Florida there are two seasons, summer and Christmas.  That presents a little bit of a problem when decorating.
I love snowmen, they're just so cute, but I've just never been able to bring myself to add them to my Christmas decor and I'm certainly not comfortable putting them up after Christmas for the rest of winter.  I mean, putting them out for Christmas is a stretch, but it is a time of fantasy, so maybe you could get away with it.  After Christmas?  Well....it just won't work.  I can't come into the house after wearing shorts all day and look at SNOWMEN!  That's just crazy!

The same thing goes for all the icy blue and white snowflake decorations and whatnots.  When you put those out and it's 70-80 degrees outside and the a/c's running, all I can see is the blue ocean when I look at them.  Not that we don't get some downright cold nights here and there.  We even had snow once.  It was my first real Christmas eve with Neil in 1989. It shut down the whole city. HA!  But more times than not, we barely get to wear a long sleeve shirt for Christmas.  So where does that leave people like me?  I really don't want to go straight from the beauty and sparkle of Christmas to the water and sand theme.  I want a little winter coziness too.

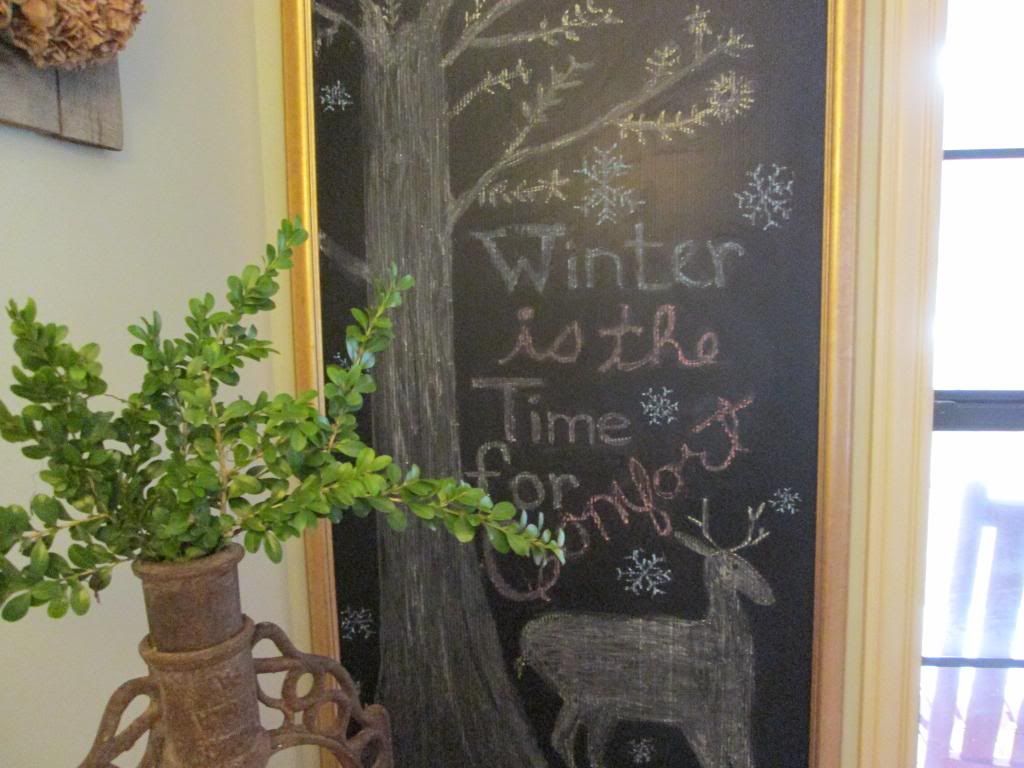
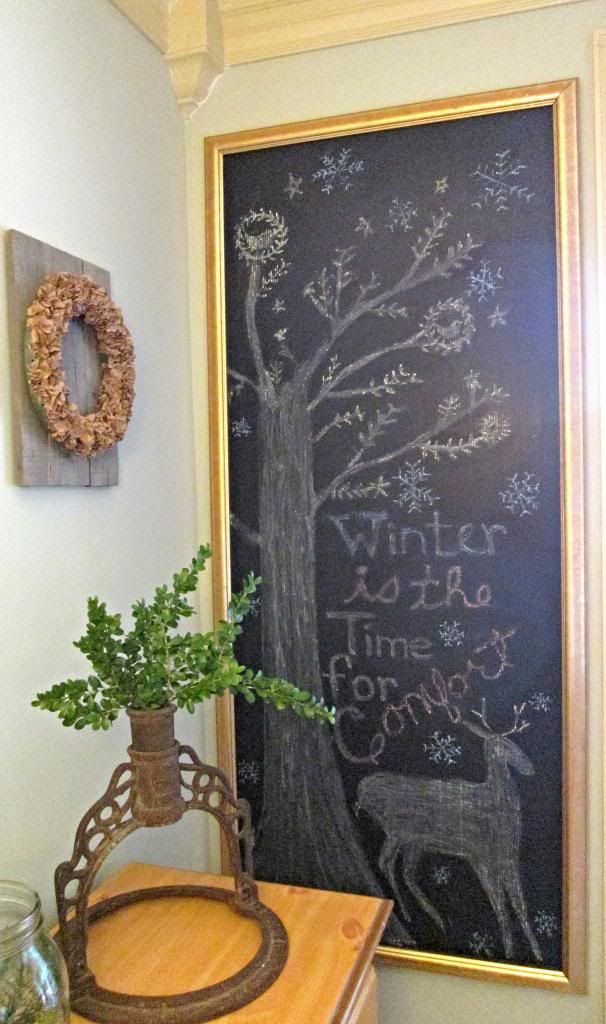
With that said, I broke down and went with a little bit of a snowy theme anyway.  We have had a bit of a frosty cold spell here lately.  So I created a faux chalk board, snowflakes and all. You'll never guess what I created this free project from.
That huge framed chalkboard, isn't a chalkboard at all, hence the name "Faux Chalkboard".  I did a bit of dumpster diving. When Neil had to find a big box for shipping, I spotted this big gold plastic frame behind a bridal shop.  It's really BIG!  It had a picture of a bride in it behind a piece of clear plastic.  But best of all the backing was this black corrugated board.  I had a thought.  Would I be able to write on it with chalk?  Low and behold, yes I could!  Score!! It's perfect, I can use the chalk and just wipe it clean.

So with a some colored chalk I already had, a bit of primitive free hand, I now have a tree, a deer (yes, that's supposed to be a deer), and snowflakes.  I think that qualifies for winter decor, right!
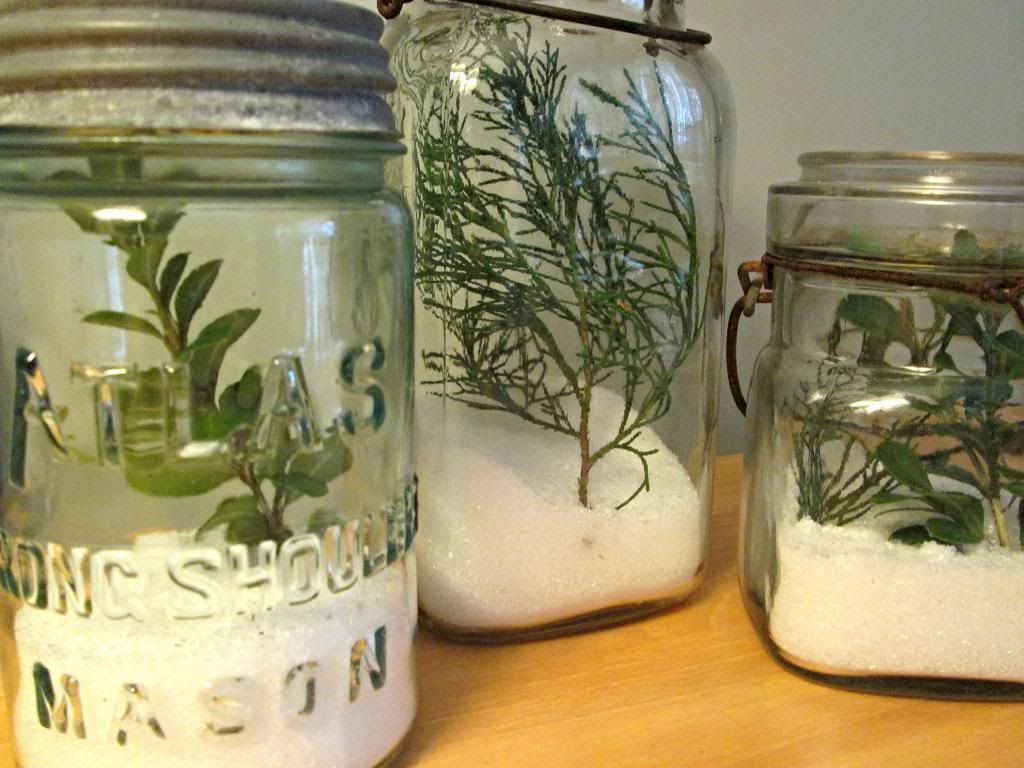
To round out the snowy scene, I added some Epsom Salt to my canning jars and just placed a few green cuttings from the garden. Mine are pine and Pittosporum branches, but you could use whatever's native to your area.  I think herbs would add a nice smell.  I love bringing some green into the house.

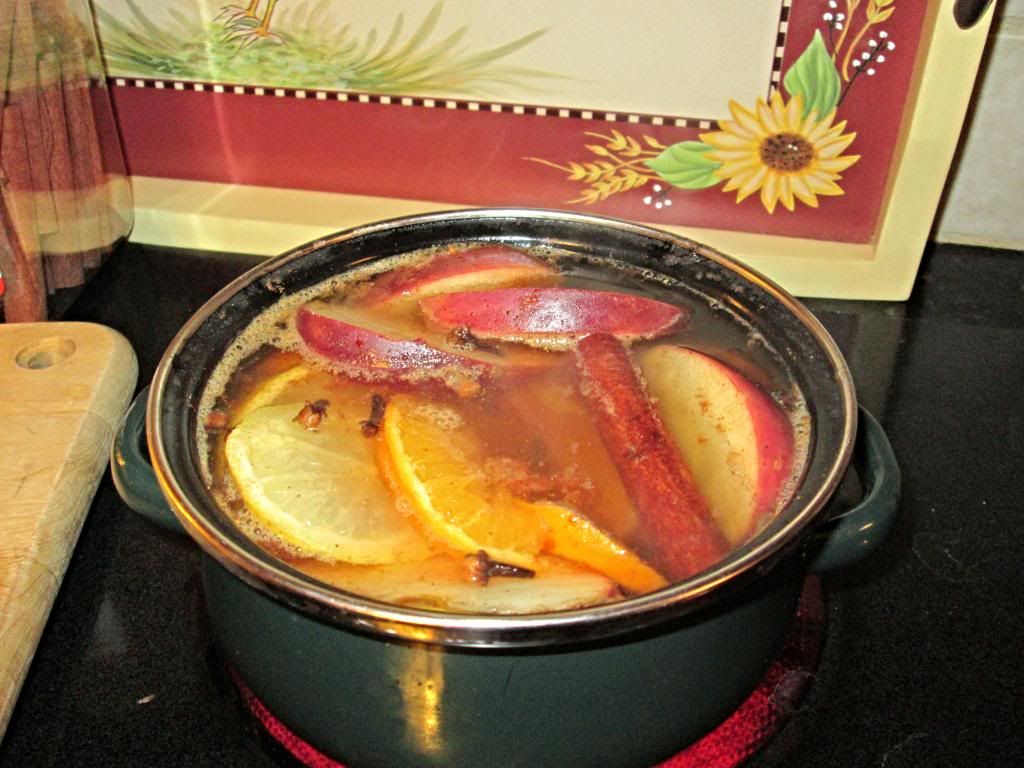
Add some winter to your home by putting some simmering potpourri on the stove.  It makes your house smell cozy.  You can see my recipe HERE.
Everything in this post was from things I had at home or found.  Another $0 project.  Remember to use what you have. It doesn't take a lot of money to make a house a home.  Just get creative, look around, and make do.  As the old adage says "nothing ventured, nothing gained".  What have you got to lose?

Don't forget today is the last day you can enter to win the Brylane Home Deep Fryer giveaway HERE.

Make it a day to remember y'all.
Hugs...
Taste and see that the Lord is good;
blessed is the one who takes refuge in him.
                                                                            ~ Psalm 32:8

Sunday, November 3, 2013

Southern Sunday Supper

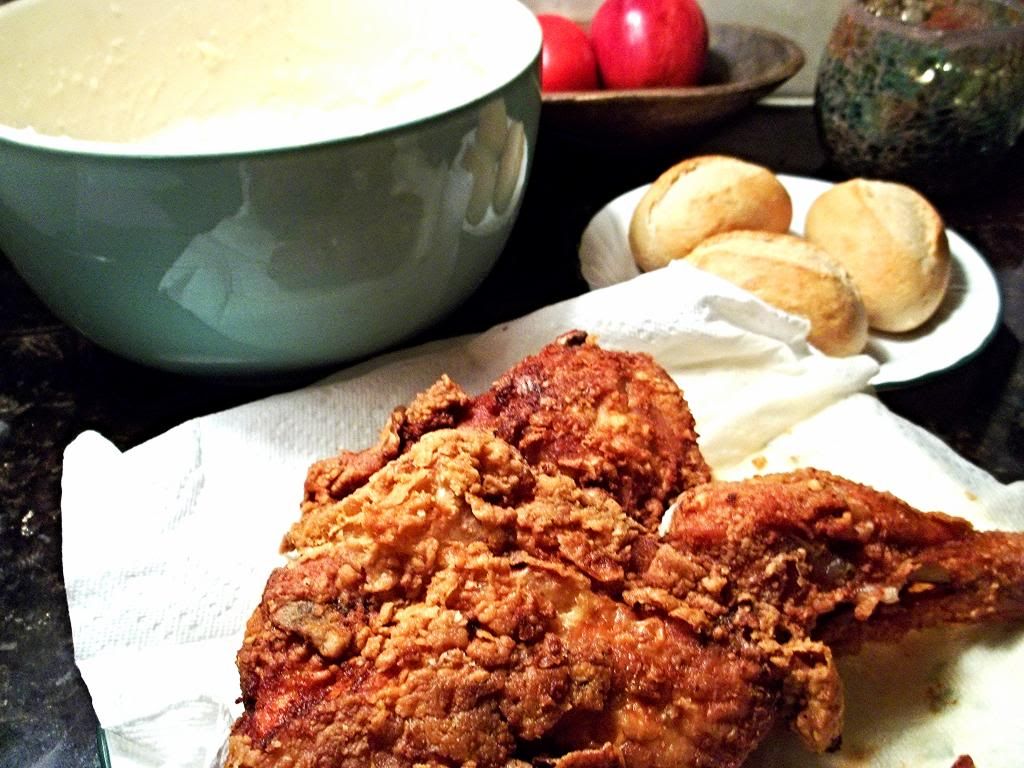
What's more Southern than fried chicken for Sunday dinner? Nothin' that I can think of.  It's been awhile since I've even thought about frying chicken and Neil suggested it yesterday.
And if I'm gonna go through the trouble to make fried chicken, I'd better start peeling potatoes, cause it'd be just undignified to serve fried chicken without mashed potatoes.  
I am a little ashamed of myself for not making any gravy. Oh' well, we'll just count our blessing that we got a chicken dinner on Sunday.  

It's really pretty simple.  Don't let the multiple steps through you off.  It really is simple.  Here's my easy steps for the fried chicken:
  • To make it easy on me I buy a cut-up chicken when possible and on sale.
  • pour a little milk or buttermilk in a bowl and combine the following seasonings in a large plastic bag:  2 cups flour, salt & pepper to taste, 1 teaspoon paprika, 1 teaspoon garlic powder.
  • drop chicken in bag of seasoning to coat.
  • Dip a few pieces of chicken at a time in milk coat.
  • Then drop back in you bag of seasoning and shake to coat well.
  • Place chicken pieces on a plate or tray and cover with a paper towel, plastic wrap or whatever to allow flour/seasoning to get paste-ie (my word).
  • Fill a heavy skillet or cast iron frying pan 1/3 to 1/2 full with vegetable oil.  
  • When oil is very hot fill with as many pieces of chicken as possible and brown on both sides.  
  • When brown reduce heat to med-high,  cover and continue cooking for 30 minutes. Chicken is cooked through at this point.
  • Remove cover and continue to cook until desired crispiness.
  • Drain on paper towels.  If you are cooking more than a pan full, let the prepared chicken rest in a slightly warm oven while preparing the rest.

Mash potatoes are quick too.  Here you go:

For just the two of us I use 3 large potatoes, adjust accordingly for your family.
  • Peel and cut potatoes into chunks and put in a 2 qt pot of water with salt to boil.  
  • Boil until you can cut with a fork (10-13 minutes).  Drain.
  • Heat a 1/2 cup (more or less) and 1/4 cup butter (I used salted butter in our house) in microwave for about 45 seconds just to warm.  
  • Combine potatoes, milk, butter.  Add salt and pepper (white pepper looks prettier) to taste.  Mix well with hand mixer and serve warm.
I opened a can of green beans and season with salt & pepper. If I'm feeling really good I'll add some bacon grease & onions.

I keep rolls or mini french bread loaves in the freeze to make life simple.  Sorry to disappoint you no time for homemade Southern biscuits here.  Okay maybe I'm just lazy.
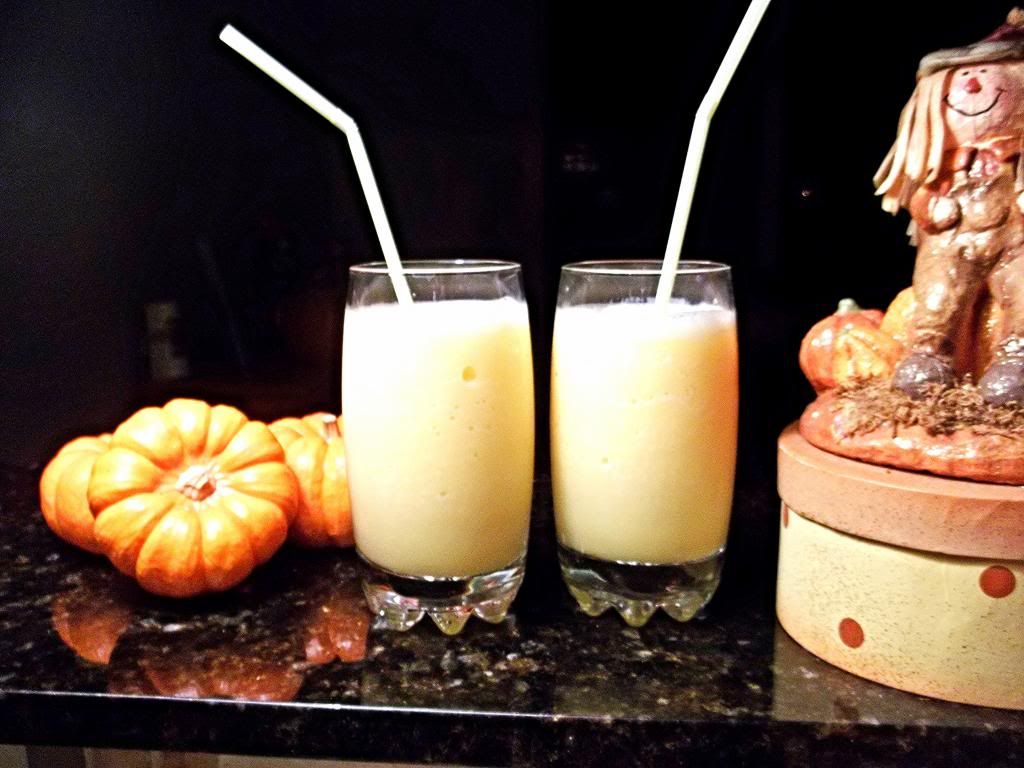
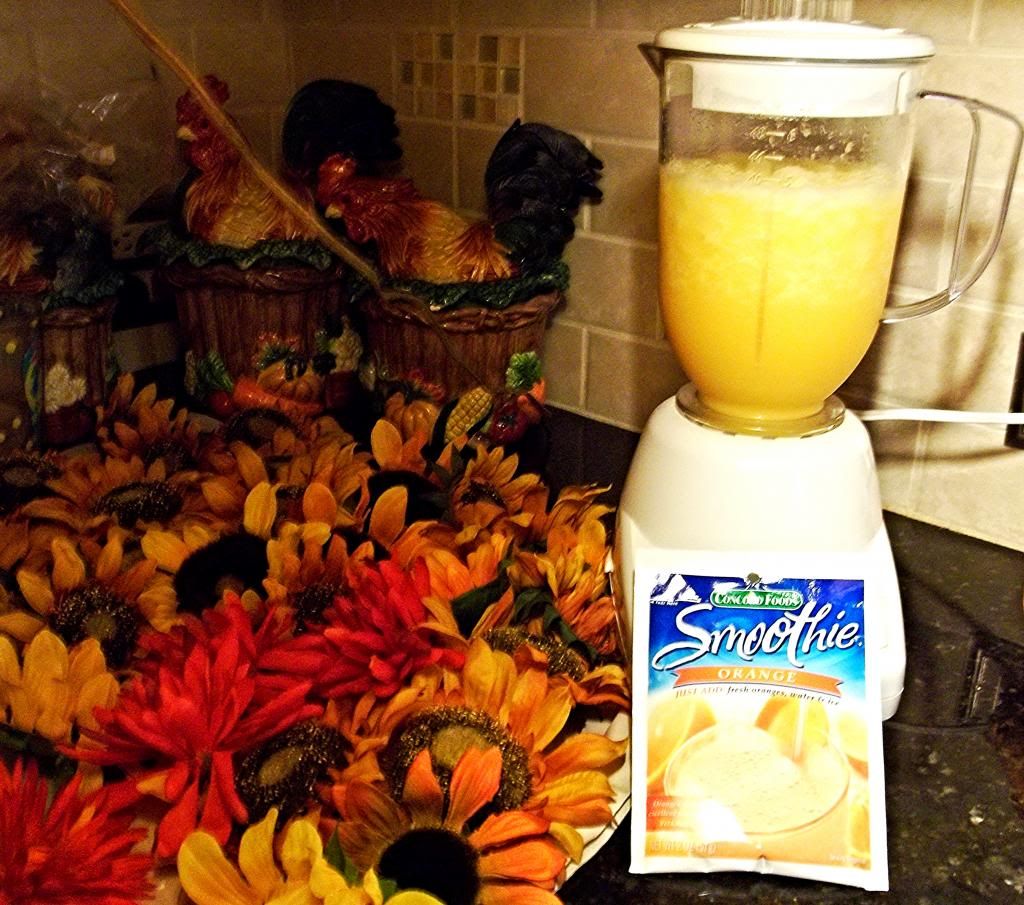
Then when the kitchen's all cleaned up (by then you're ready for something else) I fixed us a Orange Smoothie, remember the Orange Julius' one's.  YUM.  You can by a smoothie mix by Concord Fresh.  They have several flavors but we really like the Orange flavor.  All you need is orange juice, Concord Fresh mix, ice and water.  E.A.S.Y.
The only thing that could've made this day better is sharing it with family.  I sure do miss them.


Hope y'all had a beautiful Sunday...

Remember the Sabbath day by keeping it holy.
                                               ~Exodus 20:8

Saturday, November 2, 2013

Let's Make Apple Chips

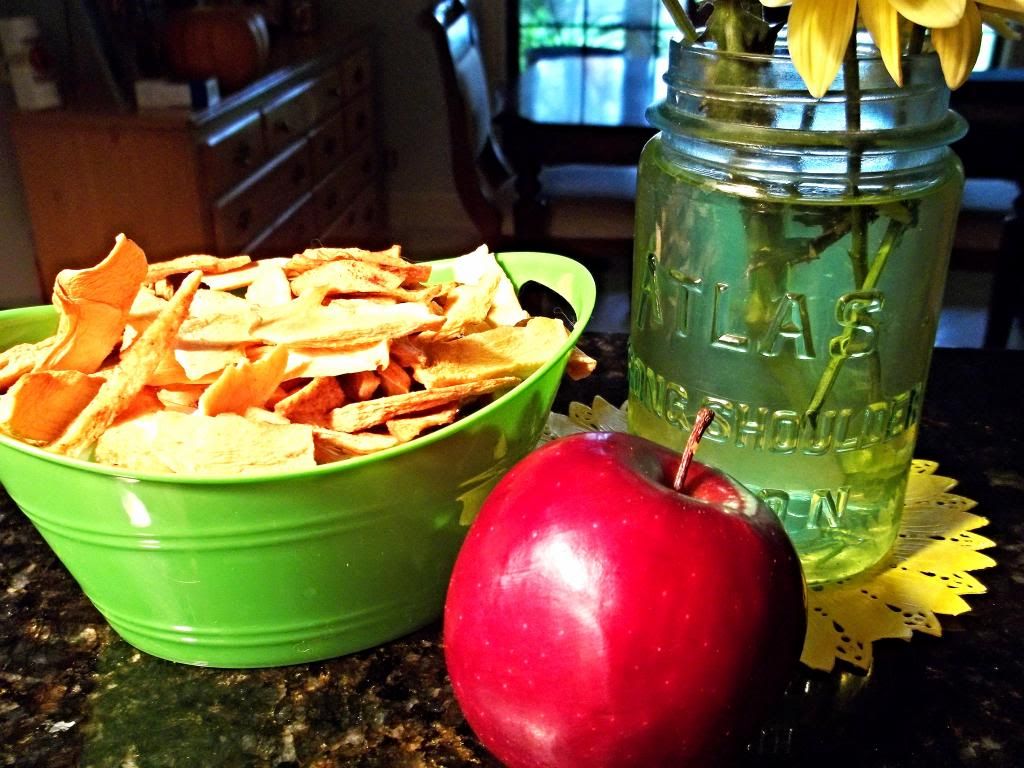
With fall comes all kind of apple recipes.  Heck, I even made Caramel Glazed Apple Walnut Bread a week ago.  Last night I decided to try my hand at apple chips.
How hard could that be right? I have apples and I've got a dehydrator.  Let's get busy.
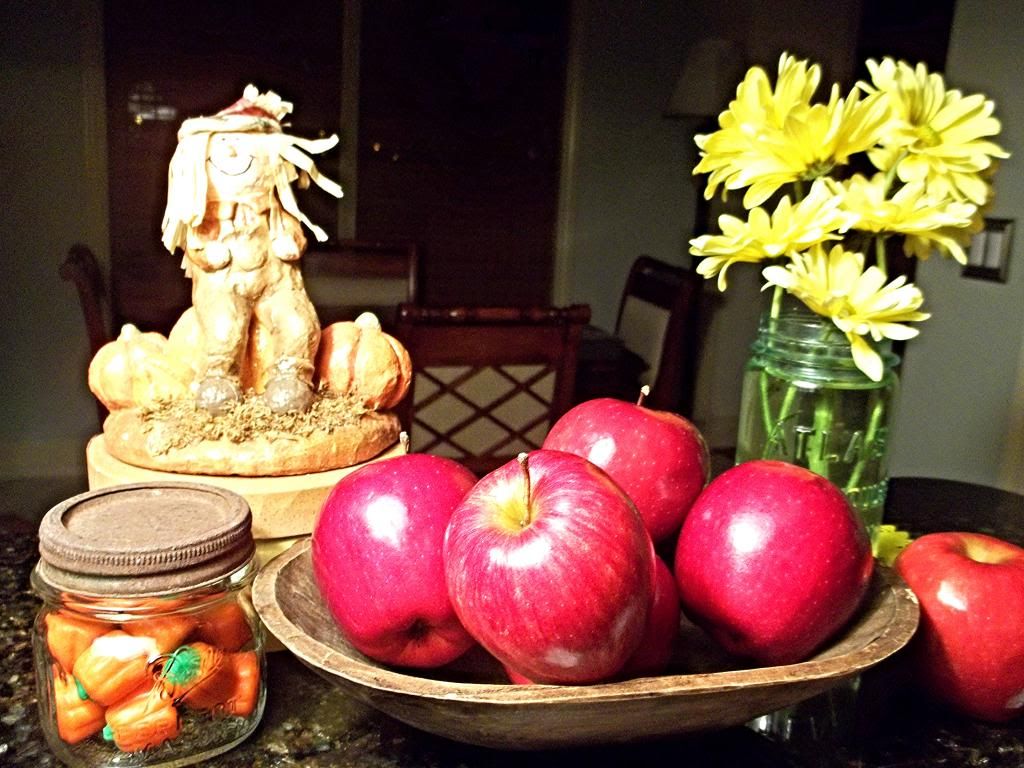
This bowl of apples was just calling my name.  The ingredients to make apple chips is really simple.

  • Apples
  • 6 cups of water
  • 2 Tablespoons of lemon juice
  • and if you prefer cinnamon apple chips you'll need some cinnamon sugar.
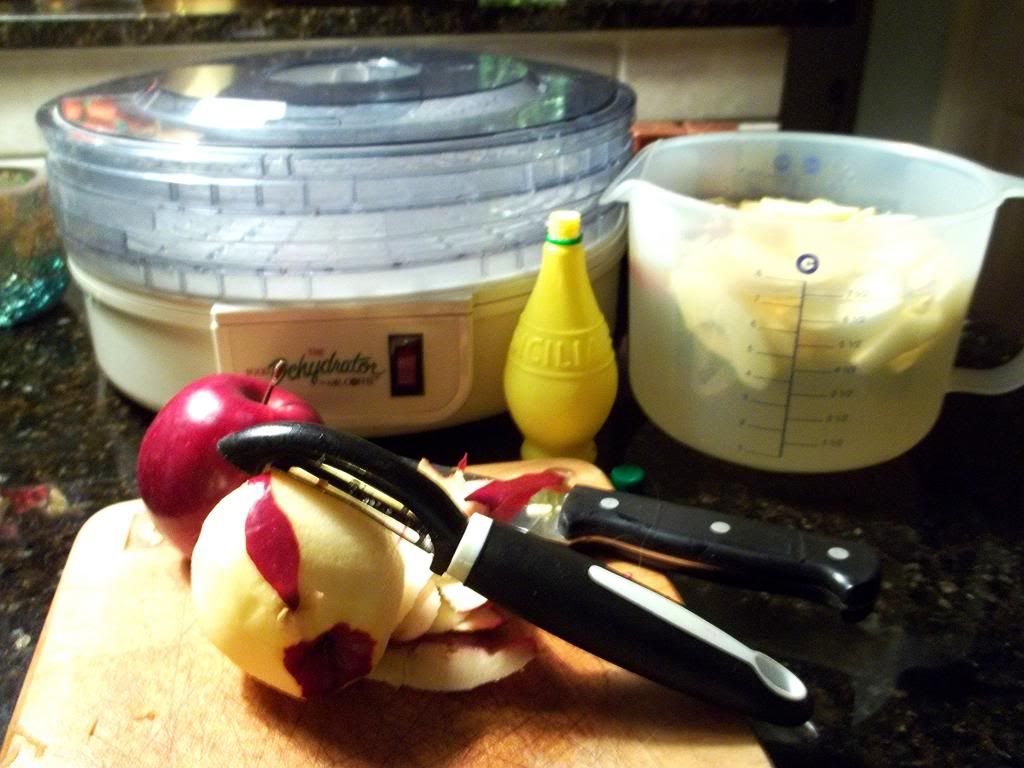
  • Dehydrator
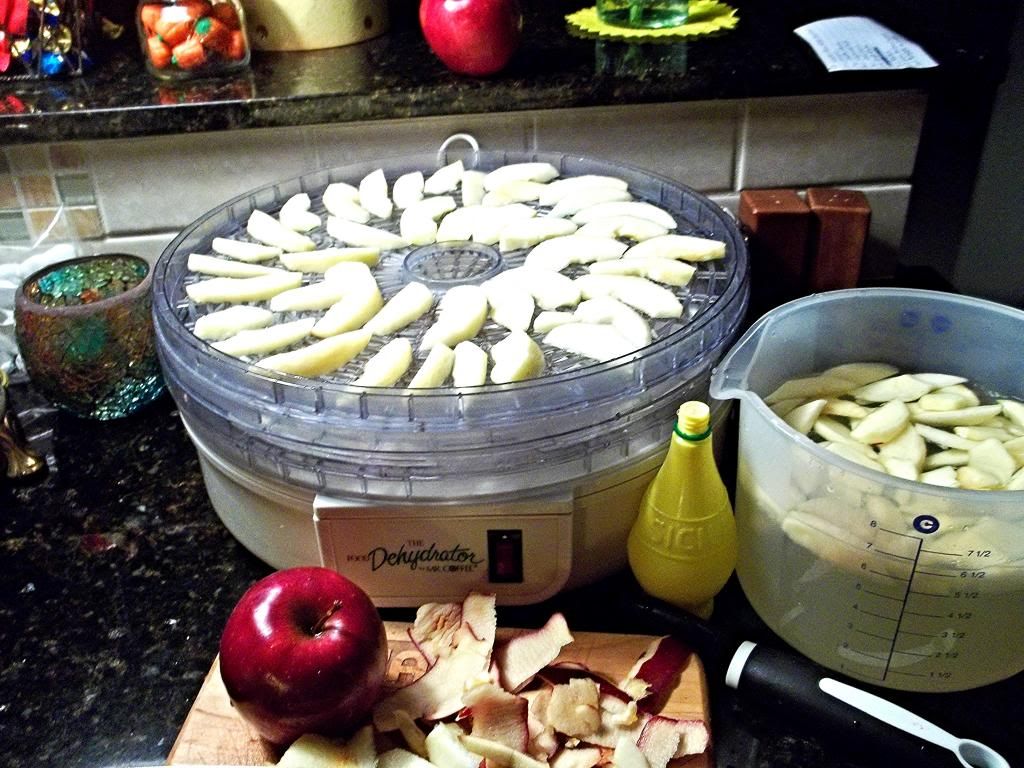
Mix 2 Tbsp of lemon juice in 6 cups of water to prevent apples from turning brown.  Peel, core and slice apples approximately 1/4" thick.  Drop in water as you slice to keep them fresh.
I decided to try both plain chips and cinnamon.  Just sprinkle on the cinnamon sugar before arranging on your dehydrator rack.  I always keep cinnamon sugar mixed up in my cabinet. We love cinnamon toast. For those that don't know it's just a little dish of plain sugar with a few teaspoons of cinnamon stirred in.

Cinnamon toast is a late night snack around our house.  It's kind of a quick cinnamon stick fix.  You just put your slice(s) of bread on a cookie sheet with a few pats of butter and sprinkle all the yummy goodness of the cinnamon sugar over the top.  Put it under your oven broiler and bake like regular toast.  Voilà in minutes you have a yummy treat.
Now the chips take a bit longer, like 12 hours to be exact. I read that it takes about 6 hours but maybe it took so long for me because my dehydrated is a gazillion years old or I just like my chips crunchier than most but 12 hours it took. That's okay - I slept through the process.

So why not treat yourself to some cinnamon toast as a reward for all the hard work (ha) you did.
So how did my apple chips come out?  YUM!  I think I like the plain as much as I like the cinnamon sugar ones.  They both have a nice sweetness to them.  An added bonus is there's no preservatives and they're all natural.  Win-Win!!

By the way, you can check out my Caramel Glazed Apple Walnut Bread HERE.  I'd love you to leave a comment telling me what you make with apples.  Do you have a favorite recipe or do you use them to craft with?  Let me know.

Hope Y'all Enjoy...

Every good and perfect gift is from above.
                                                        ~ James 1:7

Monday, July 8, 2013

Kernel Season's Review - It's For More Than Just Popcorn

Is your popcorn naked?  No one wants to see naked popcorn and I'm on a mission to stamp it out!!  That is, me and Kernel Season's are.
If you've been around here very long you already know our love for popcorn.  Until now I've pretty much stuck with one seasoning that I mix up myself.  Those days are gone now.
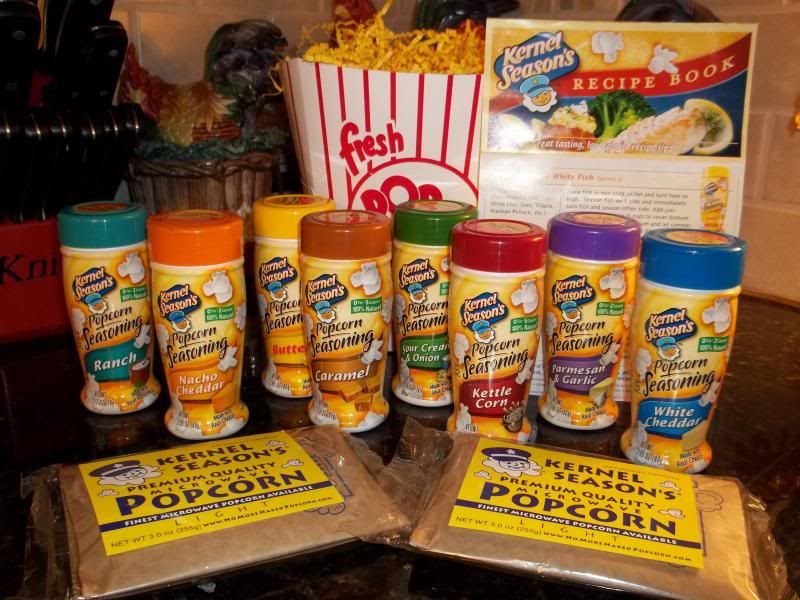
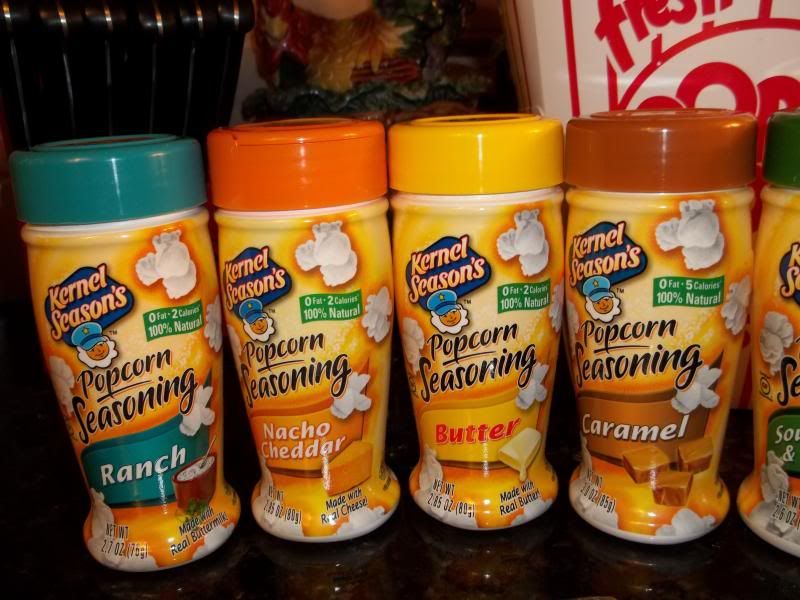
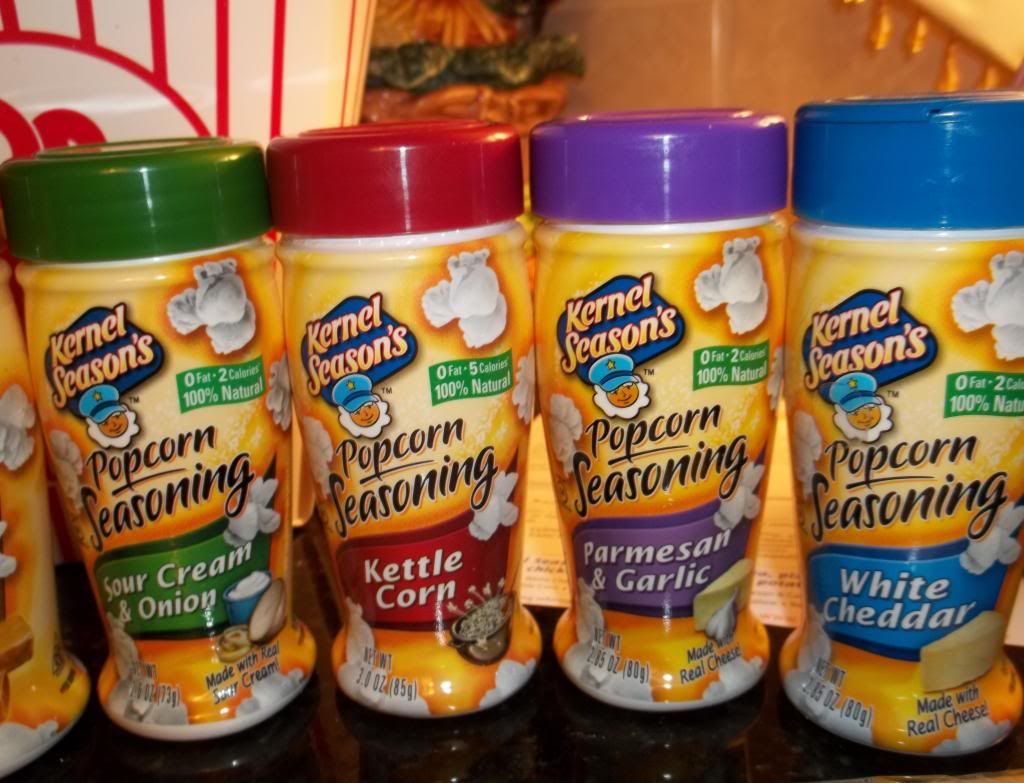
Thanks to Kernel Season's I've got a whole array of popcorn seasonings to try.  This was the first time I've ever tried their seasonings and their popcorn.  I was so surprised to get such a cute popcorn basket.  It was filled with microwave popcorn and "8", that's right "8" jars of popcorn seasonings and a Recipe Booklet in this cute popcorn bucket.  I never knew there were so many choices.  They even have more that I didn't try.  They sell 15 flavors in all.

I hate to limit them by calling them popcorn seasonings because they can flavor so much more than just popcorn.  Like the chicken nuggets I made for dinner.  They were so good.  The ranch really made them pop! (no pun intended) 
The popcorn nuggets were so easy to make.  Here's my simple recipe:

Ingredients:
2 Chicken Breasts (use how many you need)
1 egg
1/2 cap Kernel Season's Ranch Flavor (or to taste)
Pepper (to taste)
Potato Chips

Directions:
Preheat oven to 380 degrees.  Crush potato chips (I just guessed on how much) in a zip lock bag and set aside.  Cut chicken breast in bite size pieces.  Beat egg & Kernel Seasons Ranch Flavor. Dip chicken nuggets in egg mixture then roll in crushed potato chips.  Place on foil lined cookie sheet or jelly roll pan. Cook for 20 minutes.

*TIPS:  I loosely crumple my aluminum foil and then straighten out on cookie sheet, this helps them to brown more evenly.  I also found that it was easier to coat the chicken if the chips or on a plate or in a bowl.

Each of the jars lids have suggestions on what you can use them on.  But don't let that limit you, experiment and find your own favorites.  Best of all these are all 100% Natural and Gluten FreeThey have Zero fat and between 2 - 5 calories each.
I can't wait to experiment with all the different flavors I received like Nacho Cheddar, Butter, Caramel, Sour Cream Onion, Kettle Corn, Parmesan & Garlic, and White Cheddar.
So next time you're in the store look for Kernel Season's face...
and pick up your own.  It's like having movie theater popcorn at home. Remember No More Naked Popcorn!!!

To learn more about kernel Season's visit:

Try these other Kernel Season's items too!
Disclosure: We received products from Kernel Seasonings in order to do a honest review. All opinions are solely our own.


Monday, May 6, 2013

Non Coffee Drinker Looking For a Good Cup of Coffee

Yep, that's me a non-coffee drinker.  My parents would be so ashamed.  I don't remember ever seeing either of them without a cup of coffee from sunrise to bedtime, 12 months a year!  We're talking some serious coffee lovers.


Every child and grandchild crawled up onto their laps to steal spoonfuls (if not swigs) of their forbidden coffee.  I can still smell it if I think about it hard enough.

Yes, they may have been lifelong coffee drinkers but there wasn't a whole lot to it in those days.  A good can of Maxwell House Coffee was all it took.  No fancy coffee makers for these two.  Shoot they even went to instant when they got older.  But it was always the same old Maxwell House for them.  And my sister and I always knew how to make a cup for them.  Sugar and milk for mama and just sugar for daddy, no milk for a man.

And nobody would think of paying more that 50¢ for a cup of coffee.  Starbucks - there was no such thing, gourmet coffee - Pshaw! 

Why am I talking about decade old memories?  Because for the last week, since I'm back on a morning schedule, I've been craving coffee.  And it's not even winter!  Crazy, hun?  The problem is Maxwell House, just isn't doing it for me.  It's not that I'm wanting a flavored coffee either.  I just want something smooth, without that tinge of bitterness that I taste.

So in search of answers here's a tip I came up with from somewhere on the How To's of the web.

  1. Start with a clean coffee pot. Remove the filter, discard the grounds (duh) and wash the carafe in hot, soapy water after each use. (yup, already do all of these). Run vinegar through automatic coffee makers periodically to clean inside. (do that too).

  2. Use natural or gold filter. (got gold).  Don't use filters that are bleached white paper, which can add unpleasant tastes.

  3. Invest in a coffee-bean grinder or grind your own beans. (Is this what I've been missing? Really, I just want a good cup of coffee.  Not opening a gourmet shop) Buy fresh-roasted and don't grind the beans until you're ready to make the coffee.

  4. Add 2 tablespoons of coffee for each 6-ounce cup. Use a medium grind for a filter with a flat bottom. Use a finer grind in a cone filter.

  5. Brew your coffee with cold bottled water.  Don't use distilled water or water with added vitamins.  Distilled water lacks the mineral qualities good coffee needs, and vitamin water can add flavors.

  6. Drink the coffee within 20 minutes, or store it in a vacuum carafe for a few hours.

Tips and Warnings

Buy a French press to make the richest cup of coffee.  If you use paper filters, rinse the in hot water first.  Don't store coffee in the refrigerator or freezer. Keep it in an airtight container in a cool place and don't buy more than you can use in a week.

Are you serious?  I just wanted to get rid of the bitter taste. Well maybe my researched helped someone here. hmph...

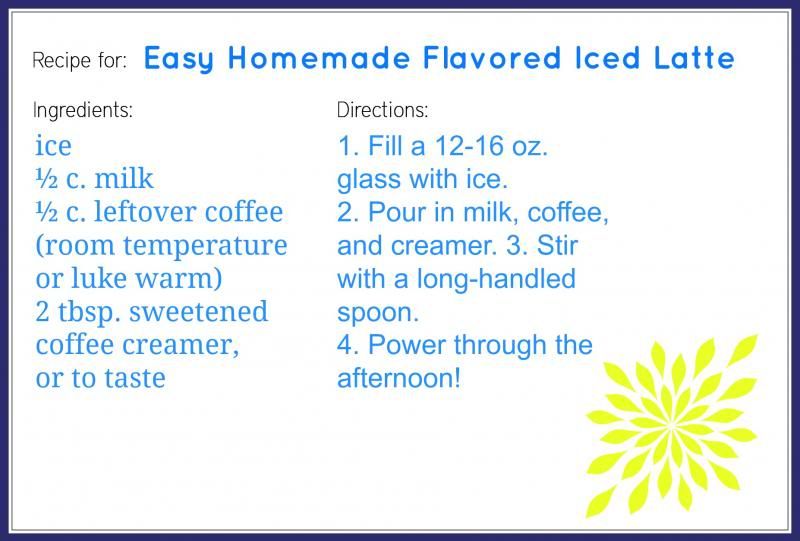
Maybe I'll just go back to Coke.  But before I do, I think I'll use this mornings left over coffee to try this little recipe I found.

*BTW - I created my first digital recipe card with Pic-Monkey.  What do you think?  Nothing fancy but not to bad for a novice.


I found a GREAT tutorial on "How To Make Recipe Cards In PicMonkey" by Brandi @ Home Cooking Memories.  You can see my pin to her tutorial below.


So who's a coffee drinker out there?  This isn't just talk this is a real question.  Plain or fancy what do you like?  Tell me about it.  Give me a hint people.  Don't let me sit and wonder anymore.  Seriously, don't make me beg.

Be sweet and mind your manners y'all!

♥ Tracy


Saturday, May 4, 2013

Watermelon Rice Krispie Treats

It was raining cats and dogs outside this weekend but I had summer on my mind.  I was thinking about the upcoming summer celebrations like Memorial Day, 4th of July and Labor Day and the party foods to go with them.  So I decided to try my hand at making Watermelon Rice Krispies.

I think they turned out pretty cute for my first shot at making them. These are easy to create and you could make them ahead of time. Those are two big pluses for me.

Like I said before this is EASY.  It doesn't get much more simple.  I only made 1/2 the recipe with just one pan.

Watermelon Rice Krispie Treats  
Lightly grease (or line with parchment paper) 2 round cake pans.  I used a 9".  I would use a smaller one next time, just my personal preference.

Ingredients:
1 box of Rice Krispies Cereal
6 Tablespoons of Butter
1 large bag of Mini Marshmallows
Chocolate Chip(Chocolate covered sunflower seeds look more real if you have them).
Green and Red Food Coloring

Green Rind Part   

4 cups Rice Krispie Cereal
4 cups Mini Marshmallows
3 Tb Butter
Green Food Coloring

  • Measure out rice krispies in lg bowl and set aside.
  • Put butter and marshmallow in a microwavable bowl ( I did mine the old fashioned way on the stovetop)
  • Microwave for 2 minutes or until big and puffy.
  • Add green (duh) food coloring and stir. 
  • Quickly poor over rice krispy cereal and mix well.
  • Put a little butter on your hands to keep them from sticking to mix.
  • Put 1/2 in each round cake pan and push around the outer edges.

Red Watermelon Part

5 cups Rice Krispie Cereal
5 cups Mini Marshmallows
3 Tb Butter
Red Food Coloring

  • Repeat steps above and pour into pans and smush.  
  • Let them cool for a bit and them cut them into triangle shapes like a pizza. 
  • Dip chocolate chips in some melted chocolate and place on treats.  

The more cake pans you have the better since these will go very quick.

Wouldn't these make a great end of school year treat for classmates!